

 Tiếng Việt
 CAMERA TRICKS
 IT TRICKS


 APPLICATION SOFTWARE
 VIDEOS

 TOOL
TOOL


 SOLUTION

 TECH NEWS
Hi everyone, today I will share with you how to install Wifi Mesh and add your TP-Link EAP series AP device Cloud Omada completely free from TP-Link company. Here I use Models EAP245 – EAP225 – EAP223, EAP245 devices I power and network signal, and 2 EAP225 – EAP223 devices I only power
1.What is Cloud Omada Free?
Cloud Omada is a platform that integrates network devices including APs, Switches, and Routers. Provides 100% centralized cloud management, to create a highly scalable network—all controlled from a single interface.

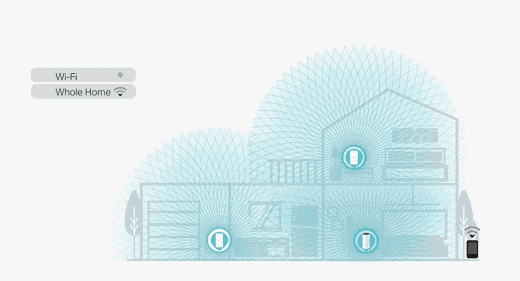
2. What is Wifi Mesh?
3. Install Wifi Mesh
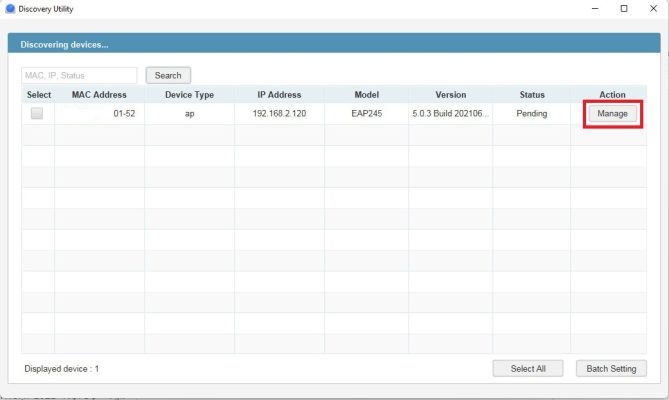
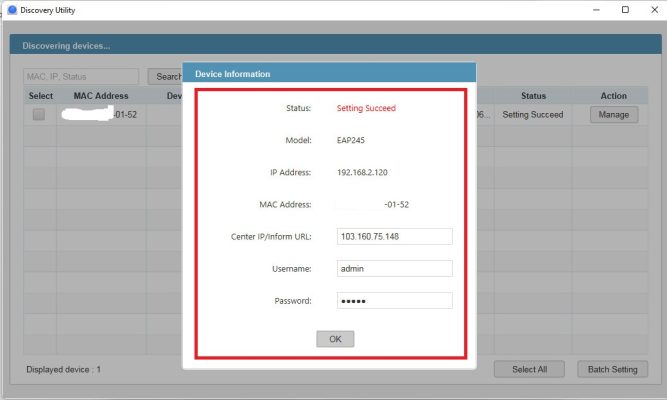
Step 1: Download the Omada Discovery Utility software here and Java 8 software here to search for TP-Link devices included in your system. After successful installation, the software will automatically scan and find the device, select the EAP device as the main node to add and click Manage
Step 2: Enter the Cloud Omada Server information
- Center IP/Inform URL: 103.160.75.148 (IP Server Cloud Omada that TP-Link sent in your registered email)
- Username: admin
- Password: admin
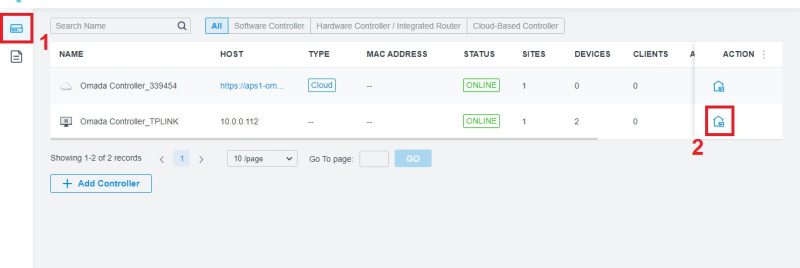
Step 3: Go to Controller -> Launch
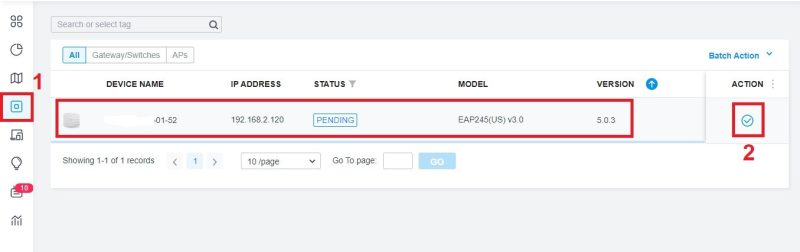
Step 4: Go to the Devices section, then check the correct Mac address, your device, select Adopt to add the device to Cloud Omada
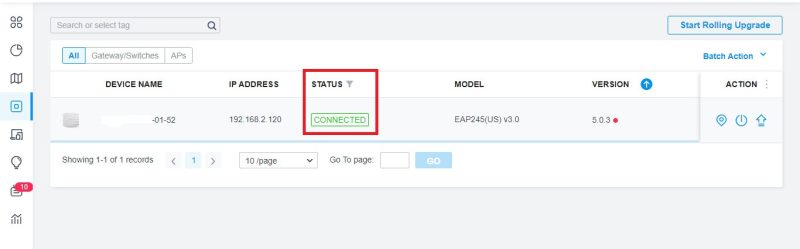
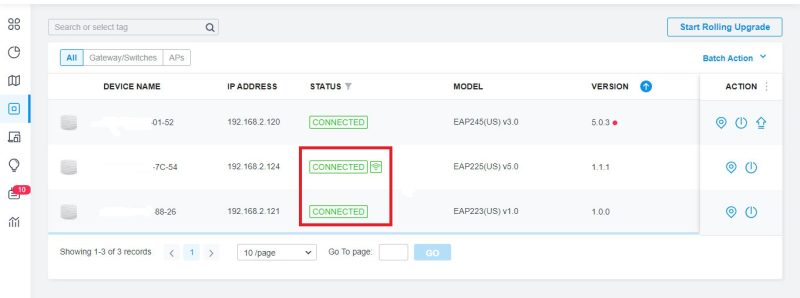
Step 5: Check that Status Conected has successfully added your device to Cloud Omada
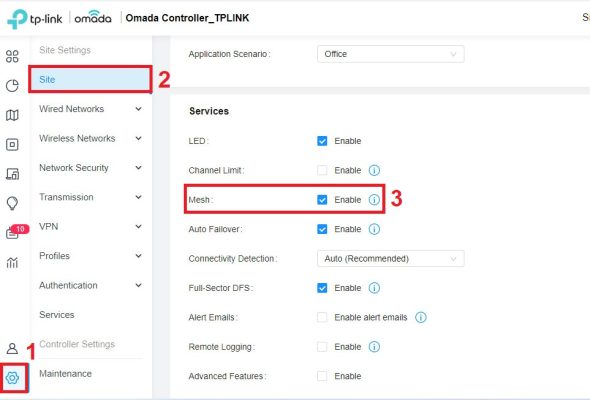
Step 6: Turn on Mesh mode on Omada, go to Settings -> Site -> Enable Mesh
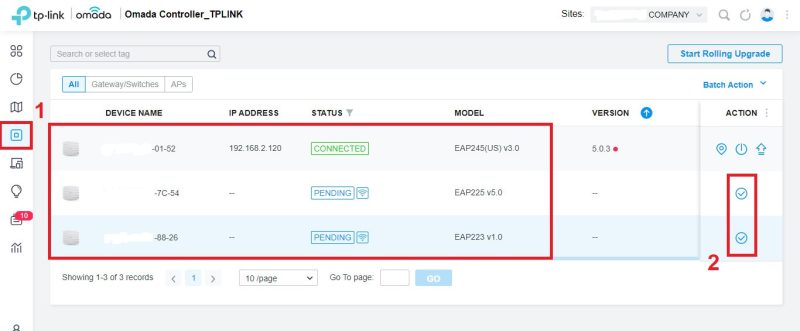
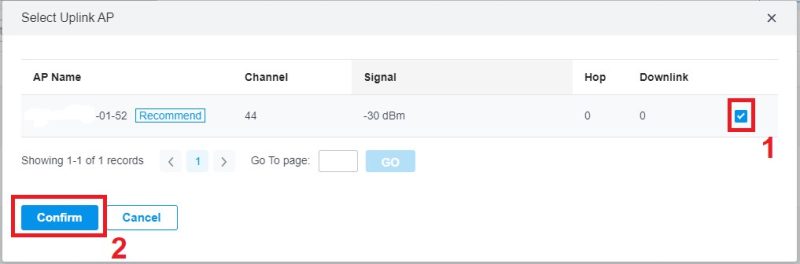
Step 7: Proceed to add EAP225 – EAP223 to the Mesh system. After powering 2 devices, go to Device will see that 2 devices are in Pending state and have wifi icons, then select each device and click Adopt wait for a while, the system will notify Conected that Mesh installation has completed
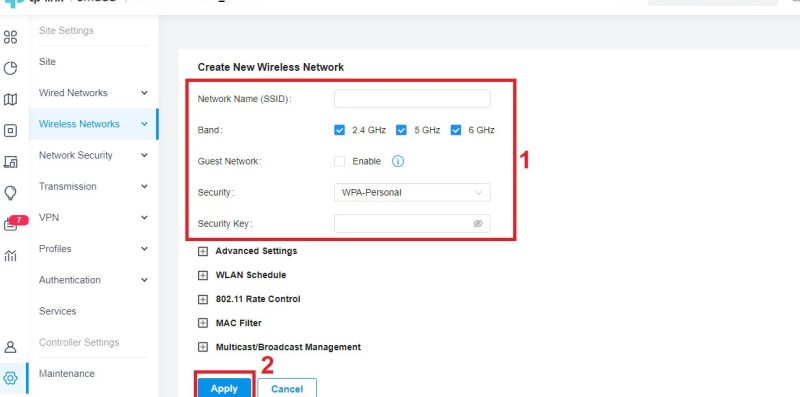
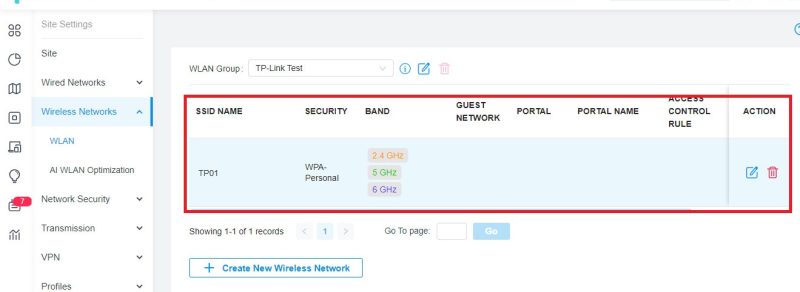
Step 8: Proceed to set up the SSID for the devices. Go to Settings -> Wireless Networks -> Create New Wireless Network

Step 9: Proceed to set parameters such as:
- Network Name (SSID): The Wifi name you want to set
- Band: The Wi-Fi band you want to install
- Guest Network: Guest network mode if you want to set up a private network for guests to use
- Security: Security Mode
- Security Key: Wifi Password
- Then click Apply to save the configuration
Thank you for following cctvit.net article!