
 Tiếng Việt
 CAMERA TRICKS
 IT TRICKS


 APPLICATION SOFTWARE
 VIDEOS

 TOOL
TOOL


 SOLUTION

 TECH NEWS
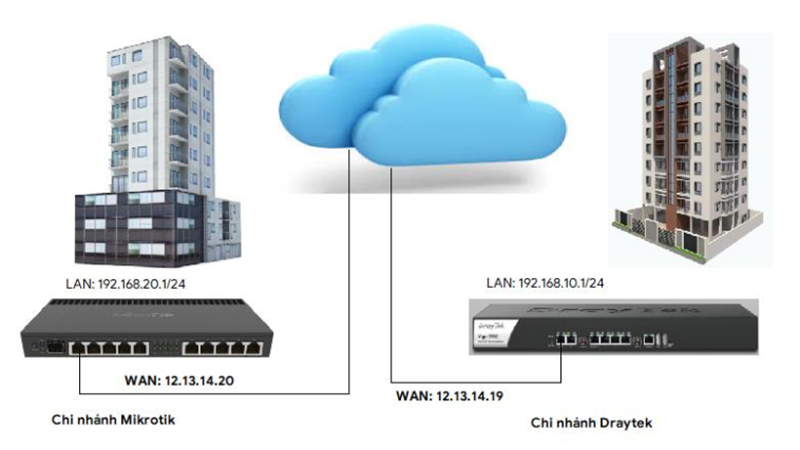
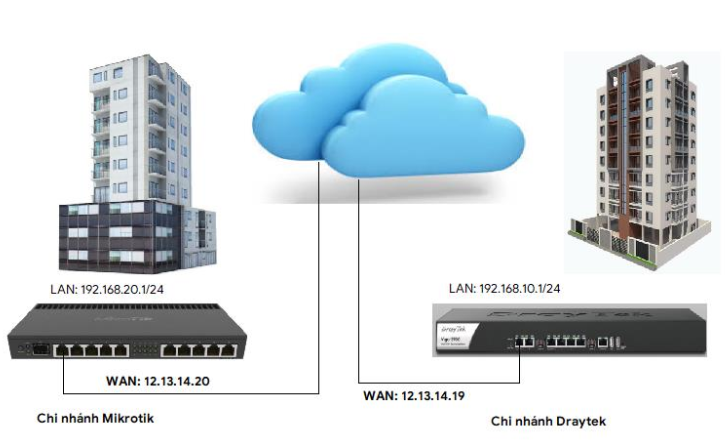
Mikrotik and Draytek routers are widely used by offices, businesses, factories because of their stability and quality. Below Mikrotik Vietnam would like to introduce instructions on how to configure the connection between 2 Mikrotik and Draytek devices to connect between branches with each other, or with the center
Contents
1. Connect 2 LANs via 2 routers using GRE tunnel.
– System analysis:
Our customers regularly exchange data between 2 LANs at each branch. With the requirement of not requiring high data encryption, we need to build a method of connecting 2 LANs over the Internet environment.
– Our customers regularly exchange data between 2 LANs at each branch. With the requirement of not requiring high data encryption, we need to build a method of connecting 2 LANs over the Internet environment.
We find that connecting LANs using Tunnel will be the best, so GRE Tunnel will be built between 2 branches.
Why Choose Tunnel & VPN?
In fact, a tunnel is a tunnel used to connect remote LANs over the Internet; while VPNs are heavily used in the model of connecting individual devices from the outside to the internal network, which has stronger protection mechanisms. Today, Tunnel has IPSec protection, so data exchanged back and forth on the tunnel is highly secure. Mikrotik router supports all 3 different tunnels, including: EoIP Tunnel, IP Tunnel, GRE Tunnel.
What are the 3 steps to set up the tunnel?
- Initiate tunnel connections at 2 branches.
- Assign IP to the tunnel point
- Directions to LANs in 2 branches.
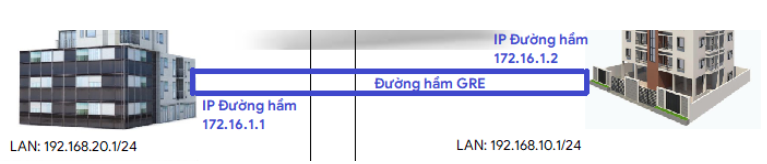
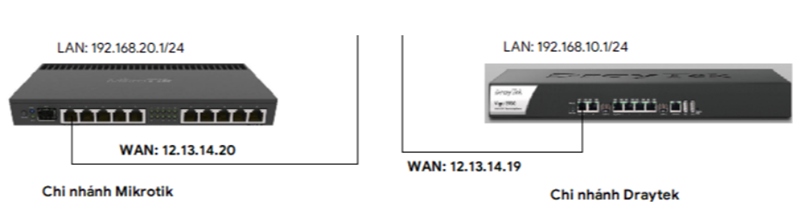
Connection GRE tunnel diagram.

At Router Mikrotik, we initiate a tunnel connection back to the Draytek router.
At the Interfaces menu – GRE tunnel
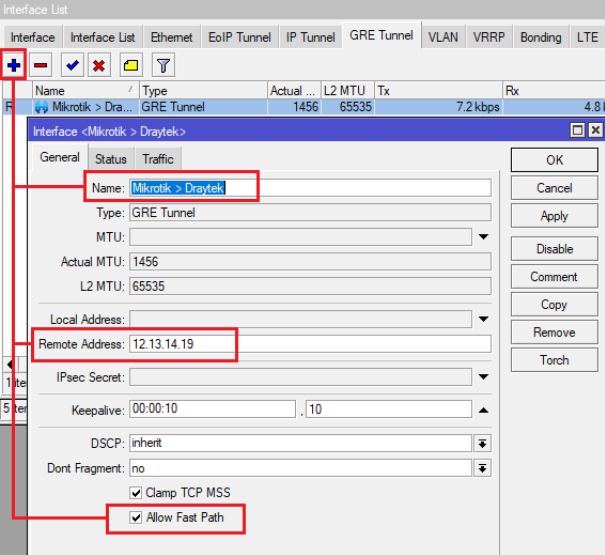
Remote Address: The WAN IP address of the Dalekek router.
Name: Tunnel
Name! The Mikrotik router doesn’t need a Local Address entry, so we don’t need to enter it.
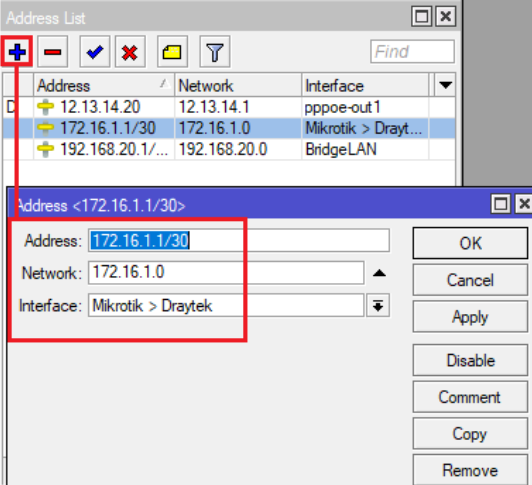
At the Draytek Router, we assign the tunnel point IP as 172.16.1.2
Finally, we show the way to the Draytek side LAN (192.168.10.0/24) on the Mikrotik router, by going through the IP Menu – Routes.
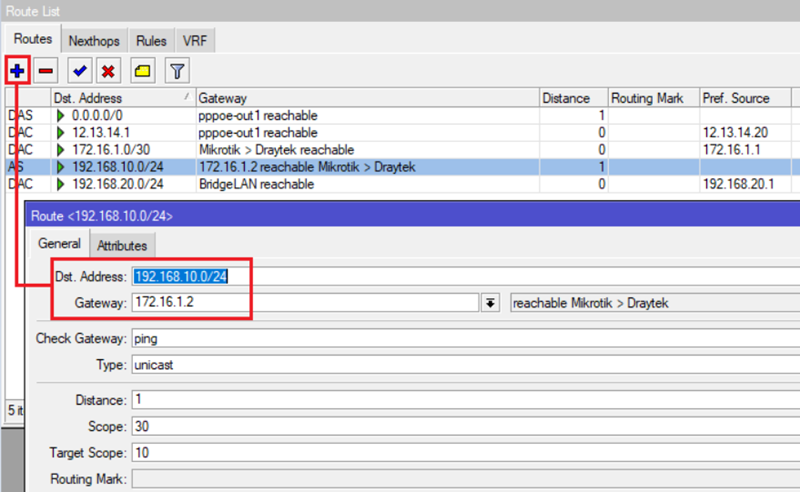
Complete at Router Mikrotik.
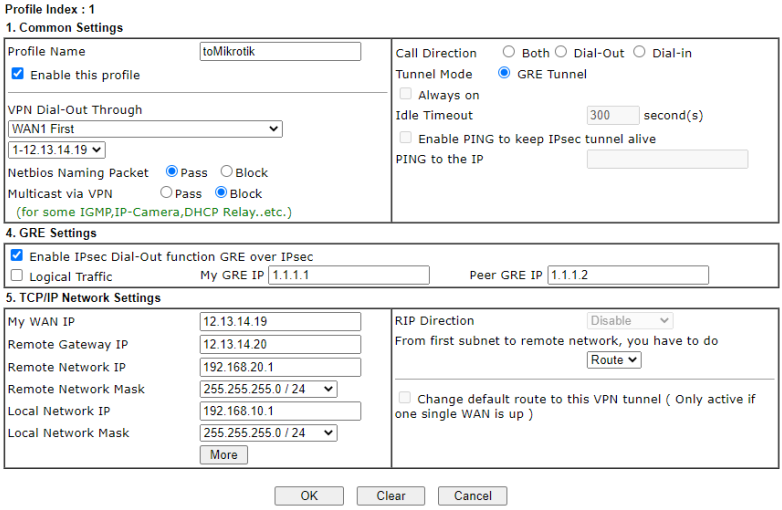
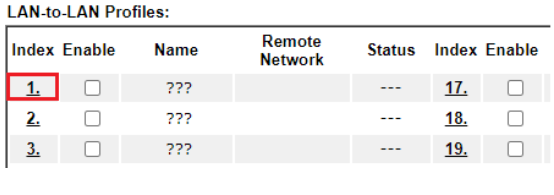
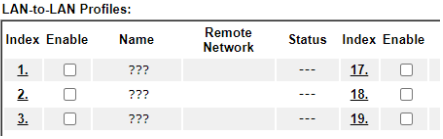
At Router Draytek, we navigate to the VPN and Remote Access Menu, and select the LAN to LAN tab.
Then we initiate a remote connection, for example select item 1.
Note !
With the current Draytek router, we can initiate up to 32 connections to different LANs at each branch. And we select item 1 to initiate a connection to the branch with the Mikrotik router.
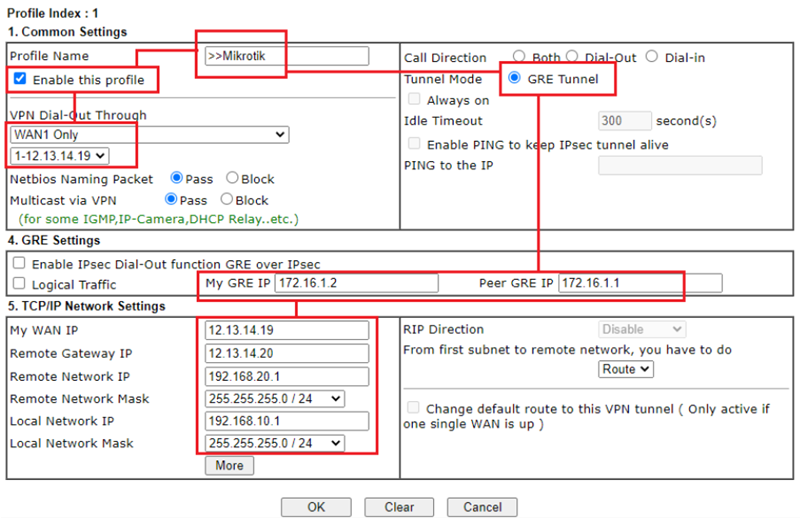
We check the box Enable this Profiles.
Tunnel Mode: GRE tunnel
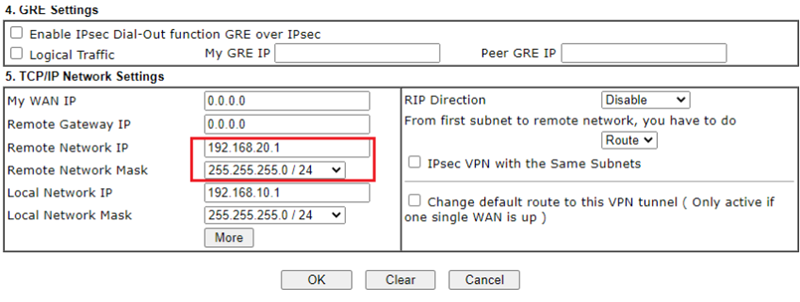
in section 4. GRE Setting:

My GRE IP: IP this head tunnel point (Draytek Tunnel IP).
Peer GRE IP: IP tunnel point other end (IP Tunnel Mikrotik).
Note!
Because the security of tunneling over IPSec on Draytek routers is a little different, we will enable Enable IPSec Dial-out… for subsequent network models later.
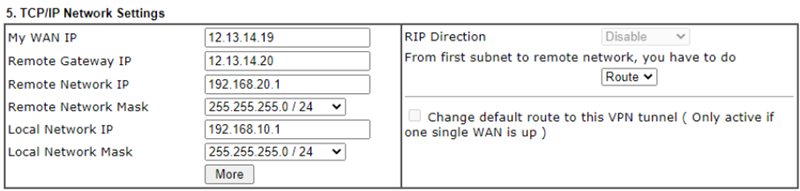
My WAN IP: WAN IP address of Router Draytek
Remote Gateway IP: WAN IP address of Router MikrotikRemote Network: LAN of Router Mikrotik
Remote Network Mask: Subnet Mask of the LAN on the Mikrotik router.
Local Network IP: The LAN of the Drakartek router.
Local Network Mask: Subnet Mask of the LAN on the Draytek router.
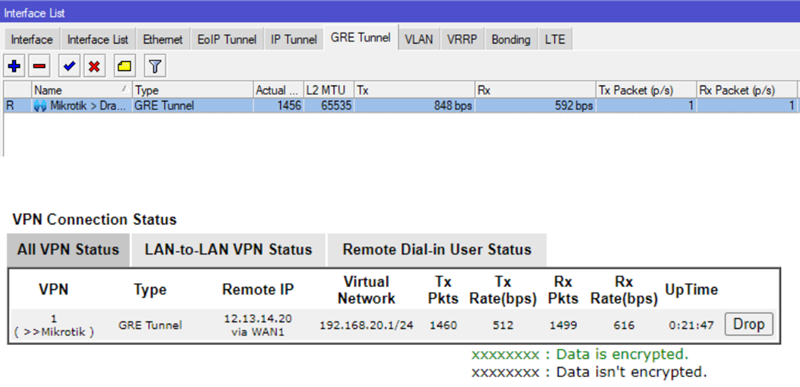
Finally, we confirm the information just entered on the Router Draytek.
Click OK to save the information.
Finish the installation process on the Draytek router.
At Router Mikrotik, we monitor the information at the GRE Tunnel tab.
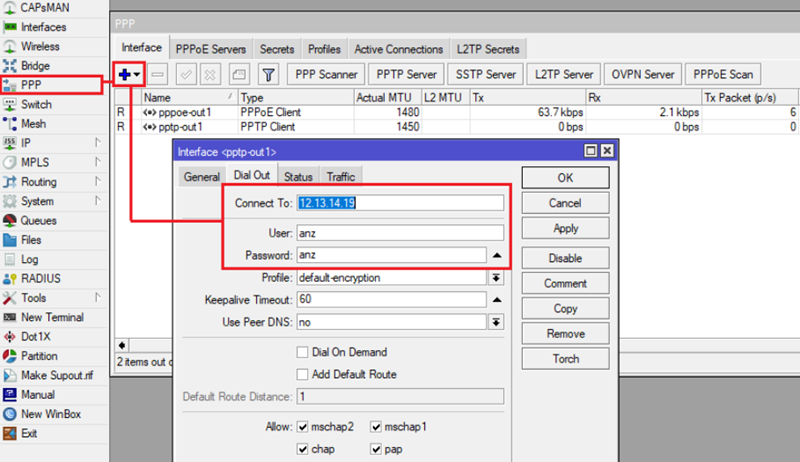
2. Connect 2 LANs via 2 Routers via PPTP VPN.
With the requirement of not requiring high data encryption, this time we need to build a method of connecting 2 LANs over the Internet environment through the PPTP VPN method.
Methods of implementation::
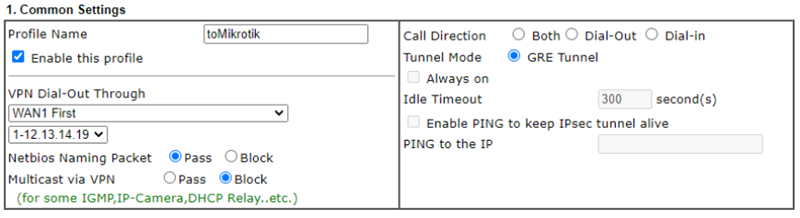
Under Profile Index: 1 and 2. Dial-Out Settings
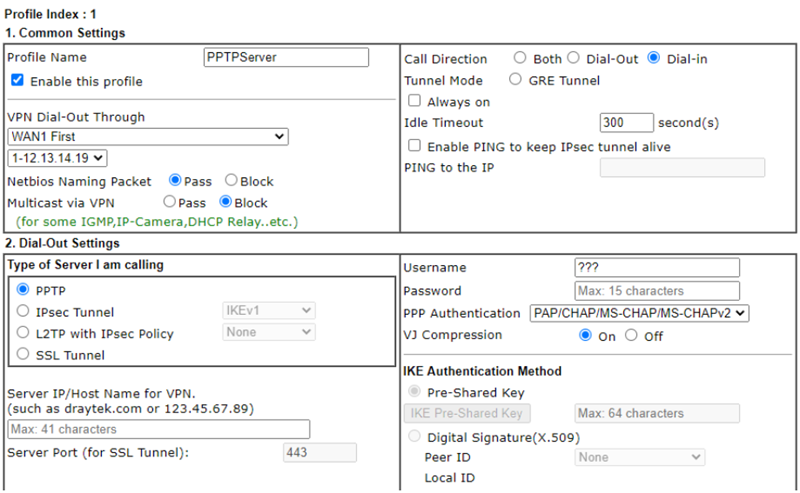
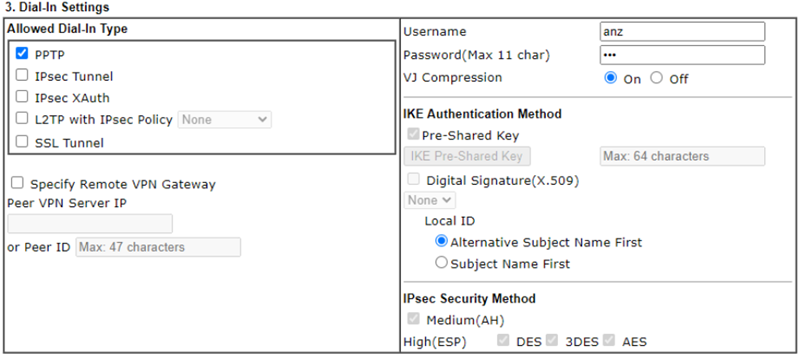
Since the Draytek router acts as a PPTP server, we will select Dial-in (listen for connections from outside the Internet). VPN Dial-Out Through: WAN 1 First to use WAN 1 as an Internet path to listen for PPTP connections from outside the Internet.
Note!
Finish the installation on the Draytek Router.

Finish the installation.
Test the installation.
We use a computer in the LAN Router Mikrotik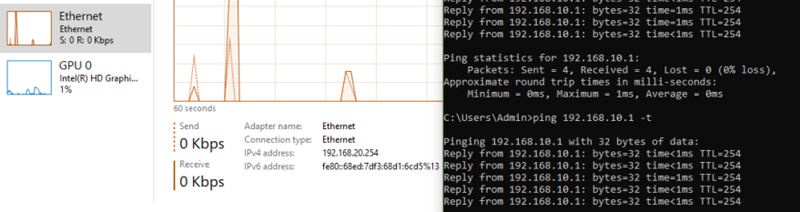
and try sending the ping command to test.
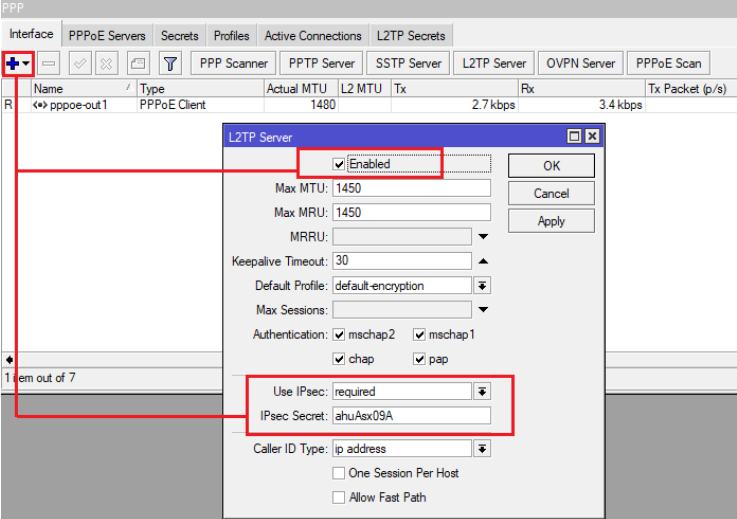
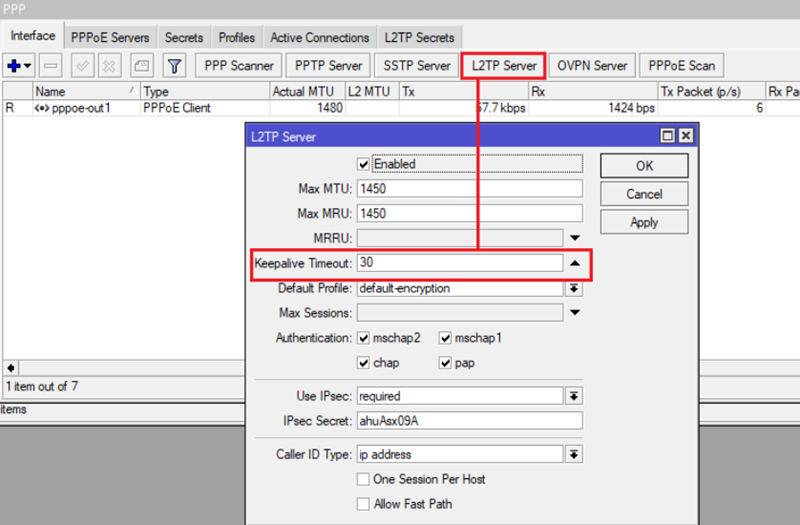
3. Connect 2 LANs via 2 Routers via L2TP/IPSec VPN.
- Initialize the L2TP/IPSec service.
- Create an account.
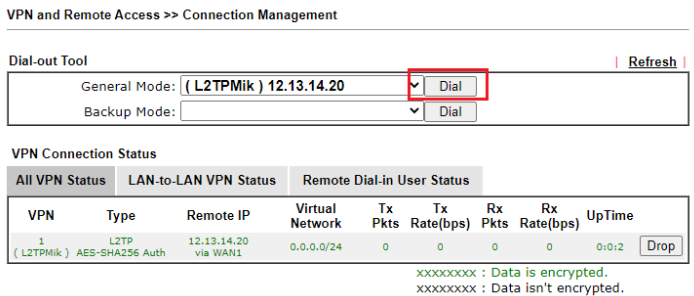
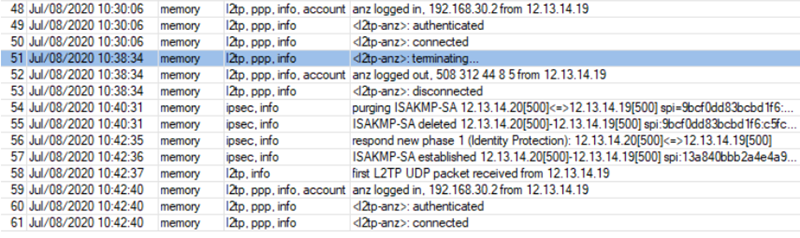
- Check the tunnel (If on).
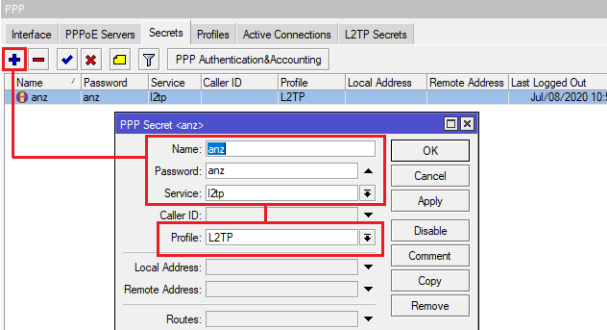
Then we go back to the Secret card to create an L2TP account,
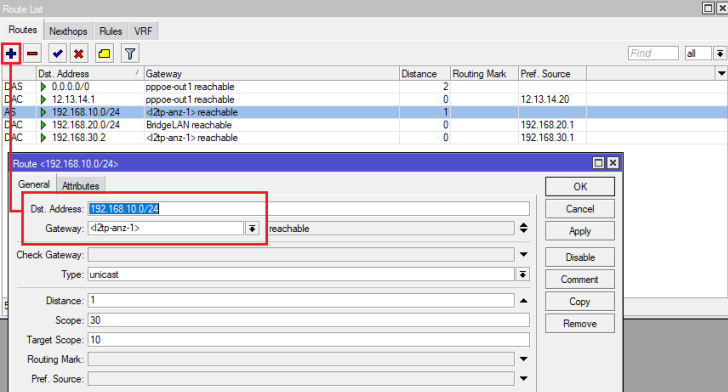
Finally, we directed the path to LAN 192.168.10.0/24 on the Mikrotik router, using the IP – Routes menu.
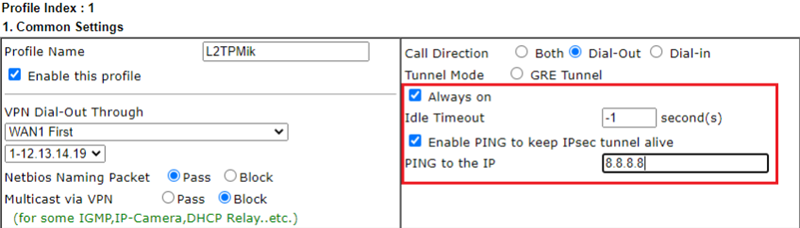
In section 1. Common Settings.
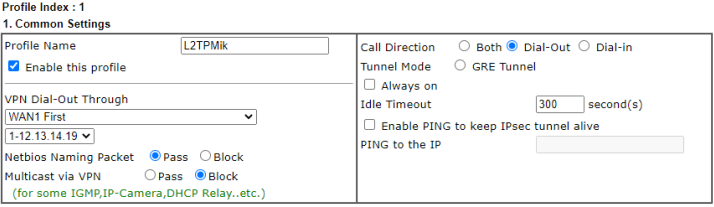
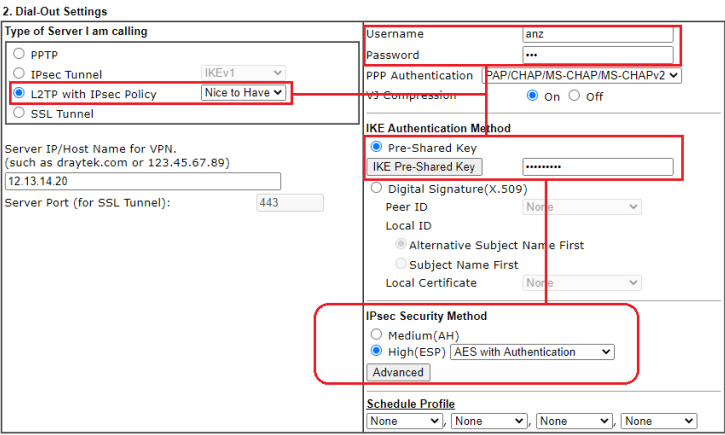
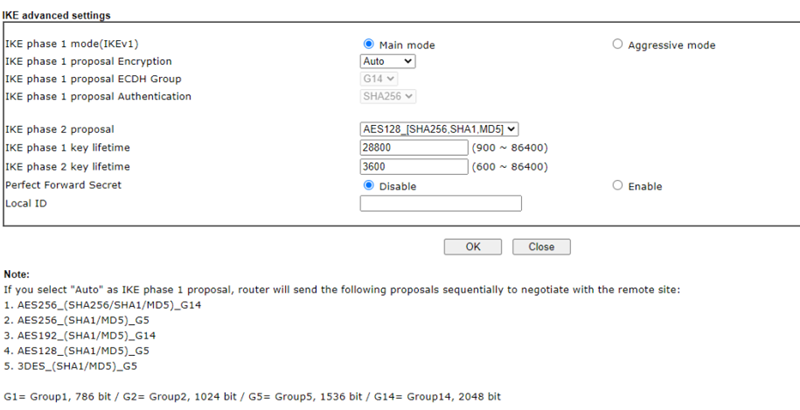
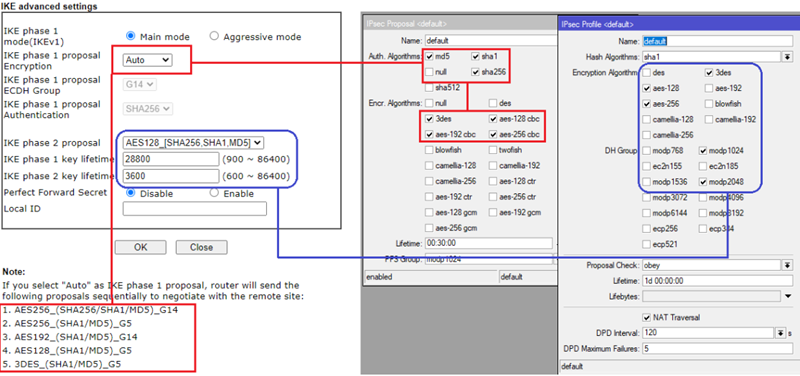
We will have some consensus in the IPSec settings on the Draytek Router.
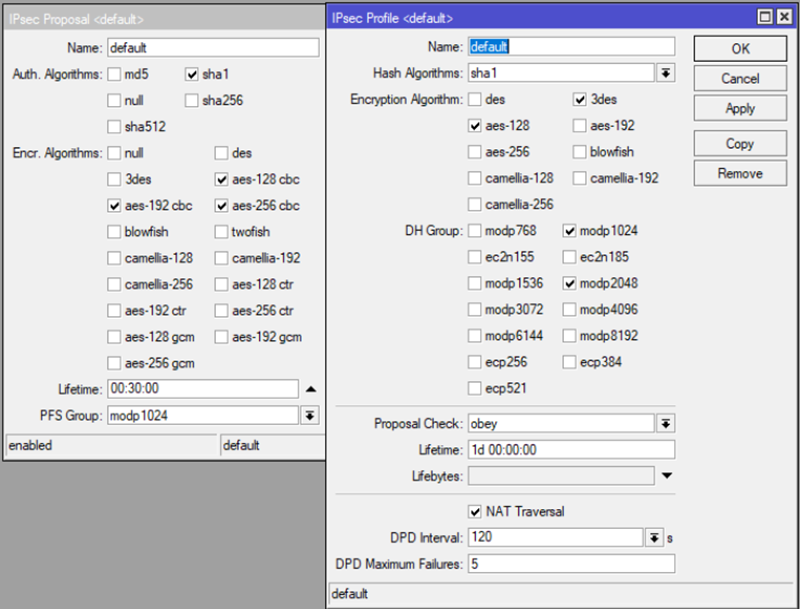
IPSec security methods on Draytek Router are implemented by us in Mikrotik Router, by:
Note!
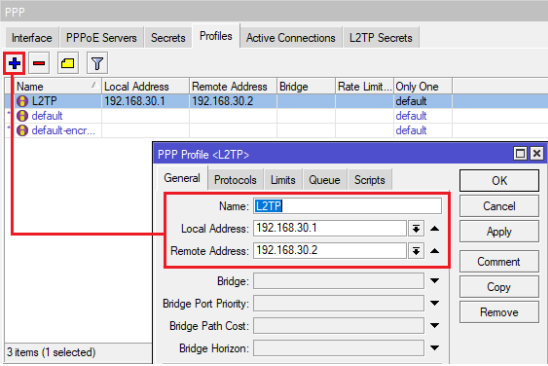
Way 2. Calibration in the L2TP Server Service on the Mikrotik Router.
Thank you for following cctvit.net article!