

 Tiếng Việt
 CAMERA TRICKS
 IT TRICKS


 APPLICATION SOFTWARE
 VIDEOS

 TOOL
TOOL


 SOLUTION

 TECH NEWS
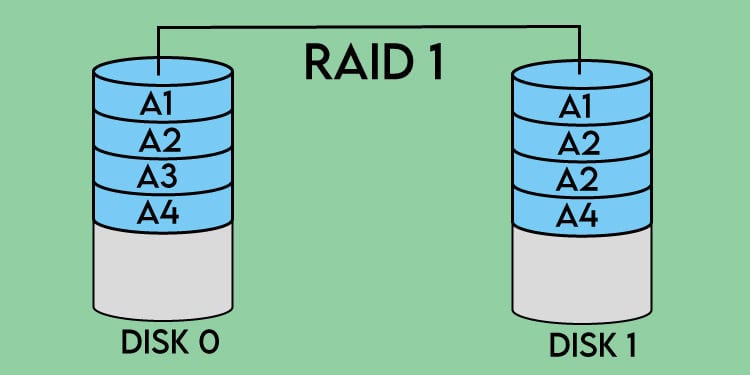
Hi guys, in the process of using the DVR to store camera data, suddenly one day the hard drive on the recorder is damaged and all data is lost, making you unable to review important data when needed, so today I will guide you to install the Raid 1 mechanism on the camera recorder of You let your data be protected as safely as possible in the following article. Note that Raid is only supported on some high-end recorder models, as in this article I use the Dahua NVR-1-EI recorder, to know exactly if your recorder is supporting Raid, you can call the company’s technician to check correctly.
Contents
- I. What is Raid?
- II. How Raid 1 works
- III. Steps to install Raid 1 on Camera recorder
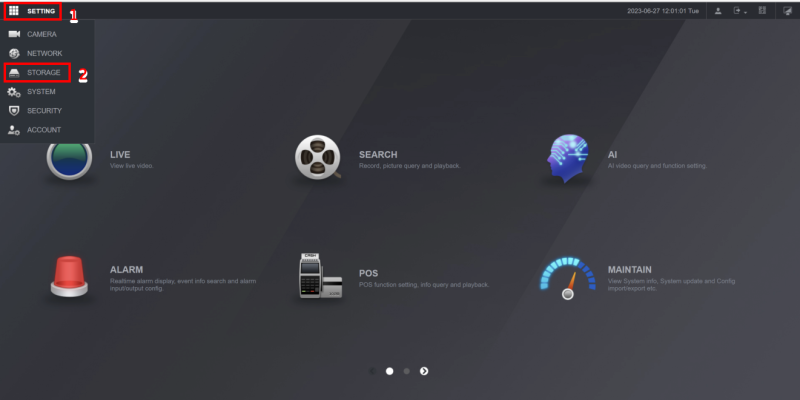
- Step 1: Go to Settings -> Stograge
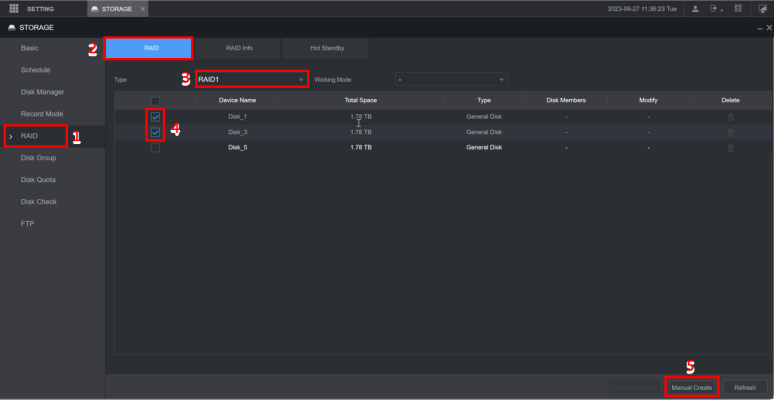
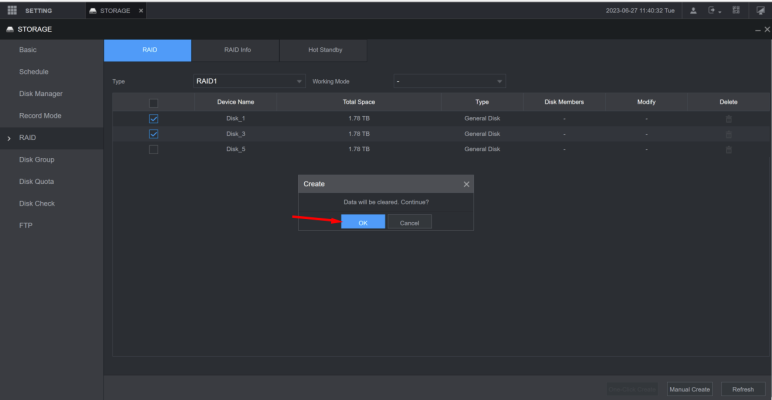
- Step 2: Go to RAID -> select Type Raid 1 then check the 2 hard drives you need to create Raid -> Manual Create -> Click OK
- Step 3: Create Hot Standby (Hot backup – in case 1 or 2 drives running RAID 1 fail, the hard drive in the Hot Standby section will be included to replace the damaged drive to help our data always be safe)
I. What is Raid?
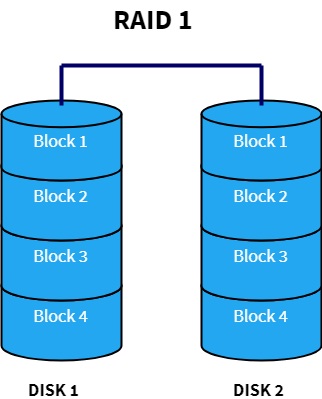
II. How Raid 1 works
Your data is written identically on two drives, the data is always the same on 2 drives at all times so raid 1 allows your data to be safe in case 1 of 2 hard drives fails. The disadvantage of raid 1 is that with 2 drives you only get dc storage capacity of 1 drive, in addition, when setting up raid with 2 drives of different sizes, raid 1 space will be taken according to the capacity of the smaller drive, so it wastes the capacity of the larger drive.
III. Steps to install Raid 1 on Camera recorder
Step 1: Go to Settings -> Stograge
Step 2: Go to RAID -> select Type Raid 1 then check the 2 hard drives you need to create Raid -> Manual Create -> Click OK
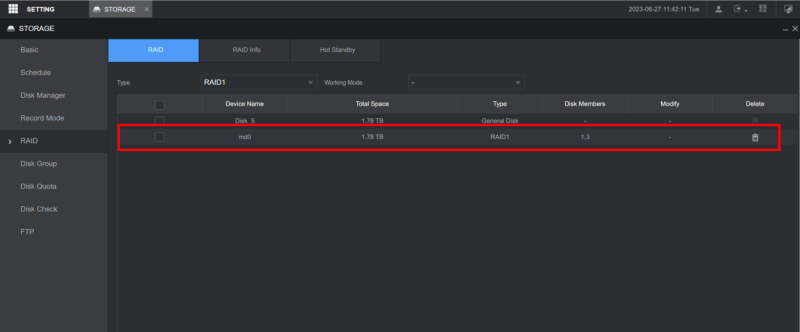
Check RAID 1 Successfully Created Status for 2 drives at ports 1-3
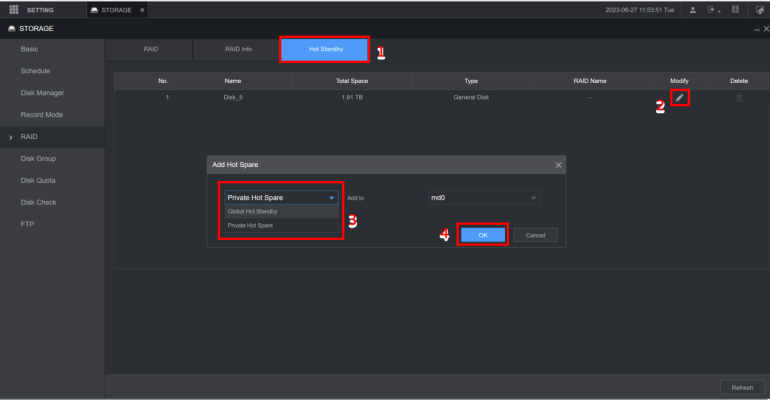
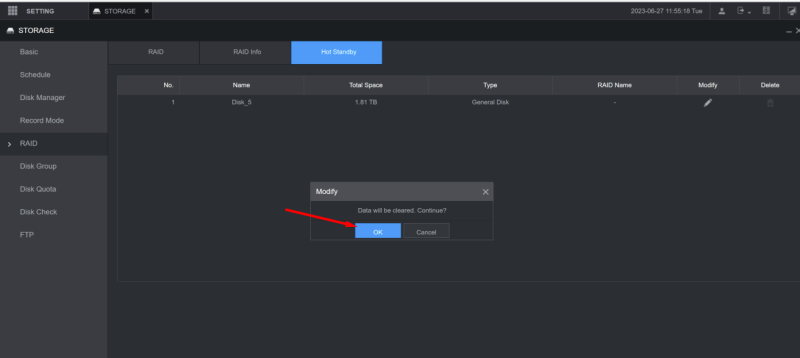
Step 3: Create Hot Standby (Hot backup – in case 1 or 2 drives running RAID 1 fail, the hard drive in the Hot Standby section will be included to replace the damaged drive to help our data always be safe)
- Go to Hot Standby -> Modify -> Select Private Hot Space -> Add to MDO -> OK
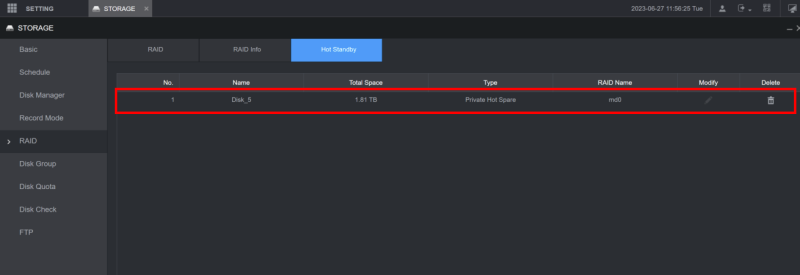
Check Status Successfully Created Hot Standby for Raid Name Md0
Thank you for following the article of cctvit.net!