

 Tiếng Việt
 CAMERA TRICKS
 IT TRICKS

 APPLICATION SOFTWARE
 VIDEOS

 TOOL
TOOL

 SOLUTION

 TECH NEWS
Hi people, when 1 company wants to set up Wifi network system for departments and these departments are in different subnets (network layers). Requires devices at 2 network layers not to communicate with each other, but still access the Internet normally. In the following article, I will guide the steps to set up the network system as required just now
Here for example, the company’s requirement needs to create 2 Wifi SSIDs for 2 departments: IT Department – HR Department with 2 separate network layers and not connected to each other but still accessible to the Internet
- IT Department: VLAN100, 192.168.100.1/24
- HR Department: VLAN200, 192.168.200.1/24
Contents
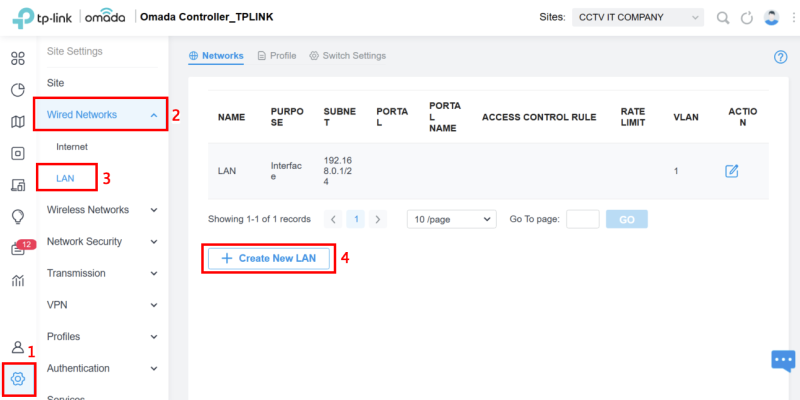
Step 1: Create Network – Install VLAN Interface and DHCP Server
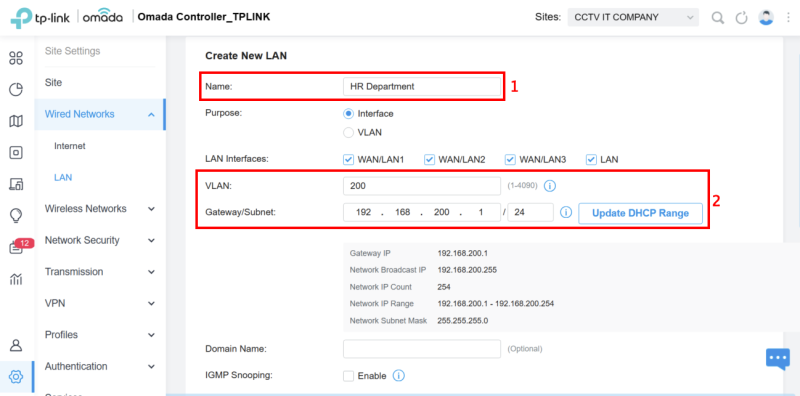
Go to Settings -> Wired Networks -> LAN Networks -> +Create New LAN to create VLAN Interface for two departments
Name the VLAN you need to create in the Name section, here I create a VLAN for the IT Department, enter VLAN 100, Gateway / Subnet: 192.168.100.1/24 -> Click Update DHCP Range
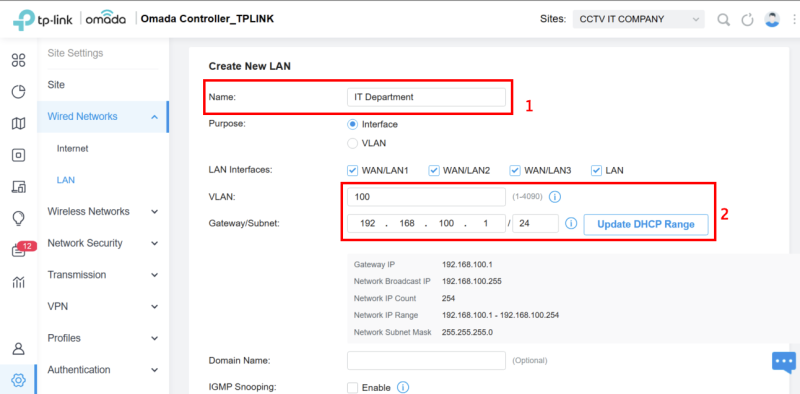
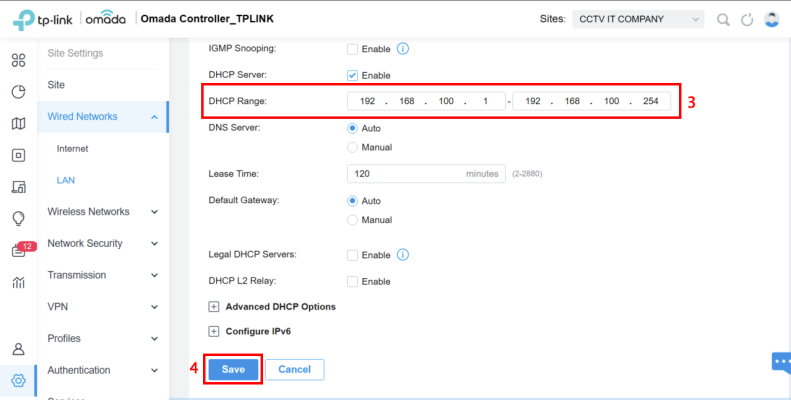
DHCP Range entry: 192.168.100.1 – 192.168.100.254 -> Apply to save VLAN configuration for IT Department
Name the VLAN for the HR Department, enter VLAN entry 200, Gateway/Subnet: 192.168.200.1/24 -> Press Update DHCP Range
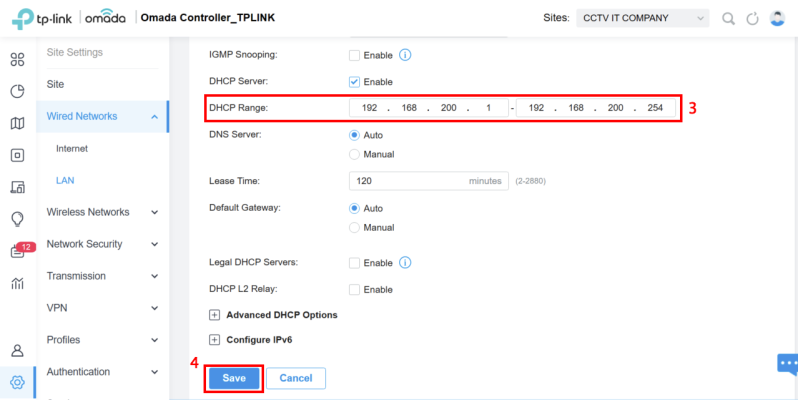
DHCP Range entry: 192.168.200.1 – 192.168.200.254 -> Apply to save VLAN configuration for HR Department
Then you can see that 2 VLAN interfaces of 2 departments have been successfully created

Step 2: Apply the Profile to the Switch port
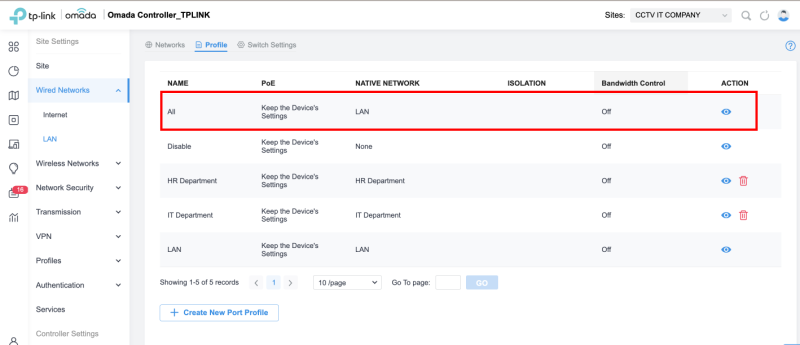
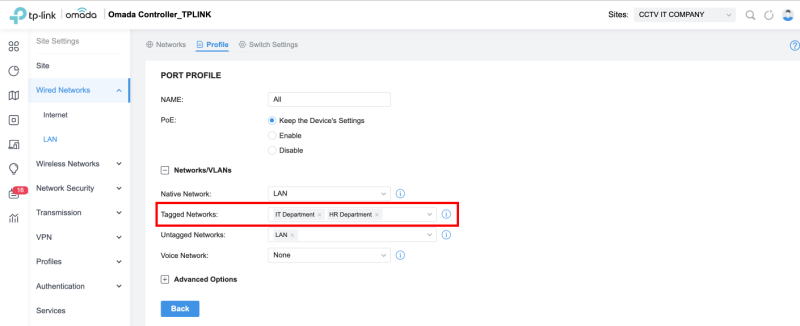
Go to Settings -> Wired Networks -> Profiles, and each network will automatically create a corresponding Profile. Here we only divide the VLAN by 2 SSIDs IT Departmen and HR Department, so I will choose the LAN port on the Switch as ALL
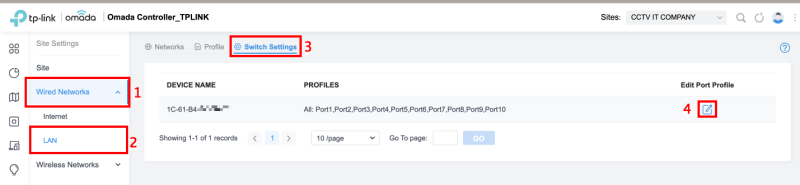
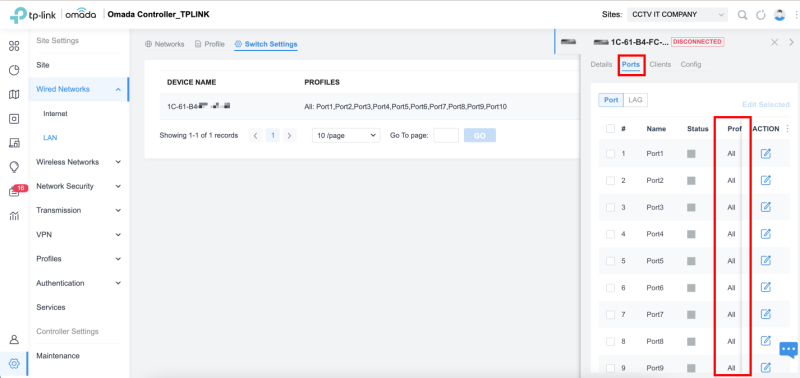
Next go to Settings -> Wired Networks -> Switch Settings, select Edit PortProfile, and by default, you can see that the ports on the Switch are associated with the ALL Profile, so just keep the original Profile.
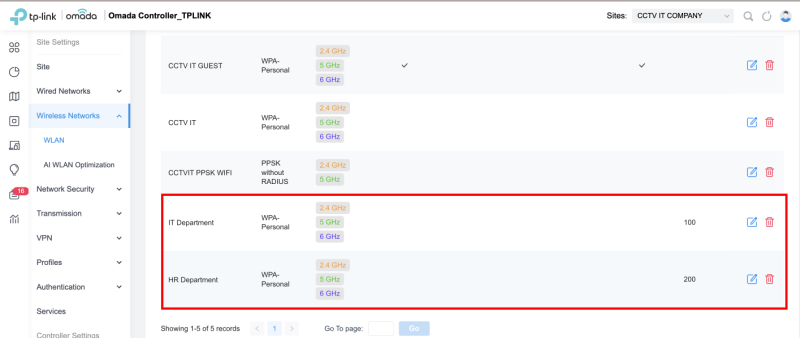
Step 3: Create SSIDs for 2 IT Departments and HR Departments
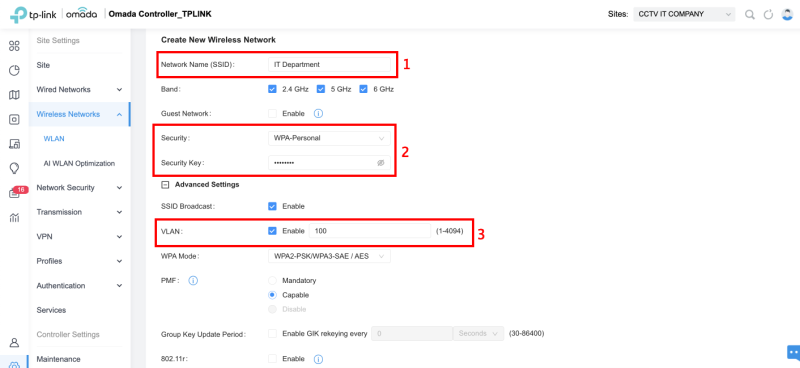
Go to Settings -> Wireless Networks -> + Create New Wireless Network, then enter the SSID name – Band – Password to create as required
- SSID: IT Department
- Security: WPA-Personal
- Security Key: 12345678
- VLAN: 100
- SSID: HR Department
- Security: WPA-Personal
- Security Key: 12345678
- VLAN: 200

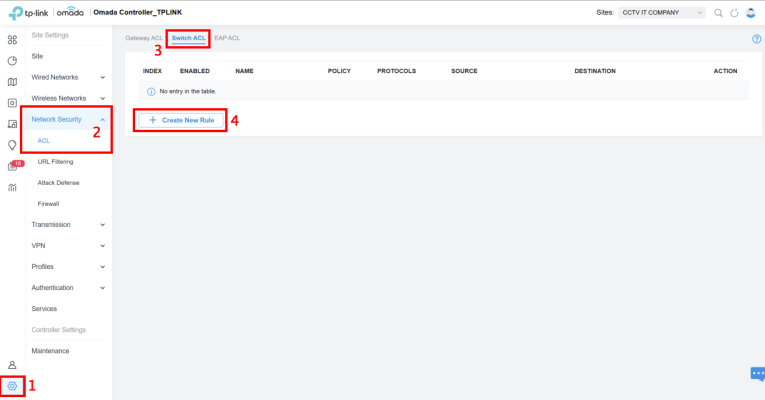
Step 4: Create an Access Control List (ACL)
The Access Control List (ACL) is a sequential list of commands used to manage incoming or outgoing traffic, specifying how to forward or intercept a packet on a device, applied on an interface, and on the buffer in or out, controlling the router to perform the corresponding actions of allow or deny.
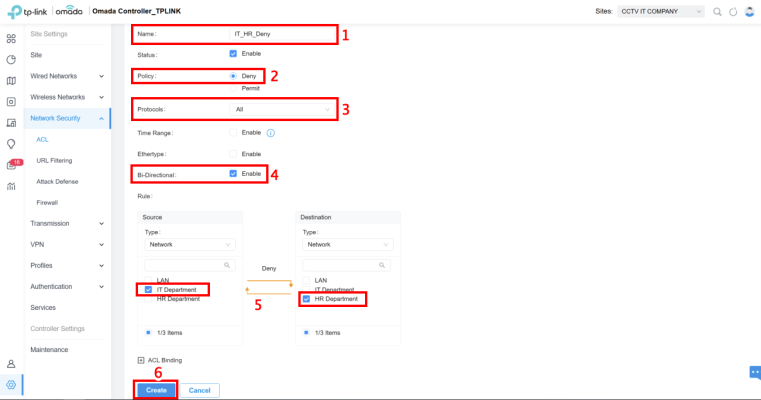
Go to Settings -> Network Security -> ACL -> Switch ACL -> + Create New Rule
- Policy: Deny
- Protocols: ALL
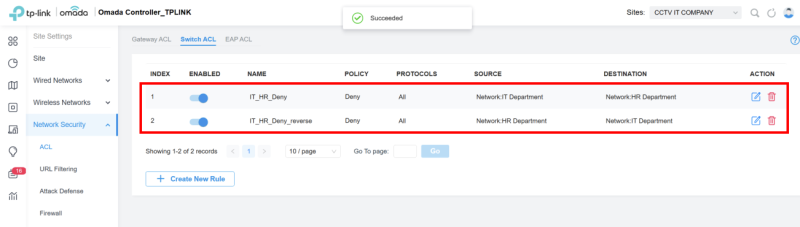
- Bi-Directional: Enable
- Rule: IT Department <-> HR Department
- Binding Type: Ports
- Ports: All Ports
Thank you for following kabevision.com article – good luck!