

 Tiếng Việt
 CAMERA TRICKS
 IT TRICKS


 APPLICATION SOFTWARE
 VIDEOS

 TOOL
TOOL

 SOLUTION

 TECH NEWS
Hi guys, when you use the internet but your company’s network only uses 1 internet connection of 1 network operator, when that carrier’s transmission has a problem that affects your business, so to ensure your network always operates in the smoothest way, Using network resources in an optimized way, you should have 1 or 2 more Internet connections from different carriers for load balancing and redundancy, and in the following tutorial I will introduce to you how to configure multiple network connections on TPLink router on Omada Controller!
Contents
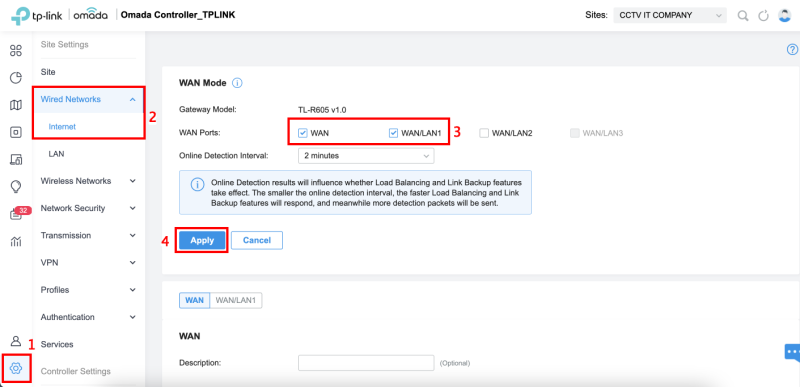
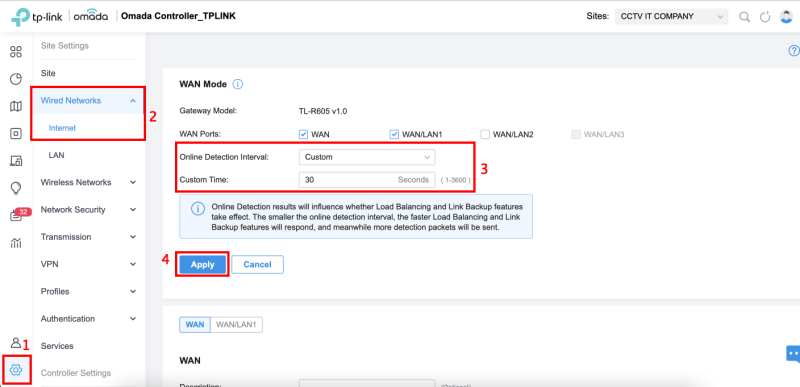
First, you need to Enable Multi-WAN port on the router
Go to Settings -> Wired Network -> Internet, check WAN/LAN1 (the port where you attach the 2nd network line), then click Apply
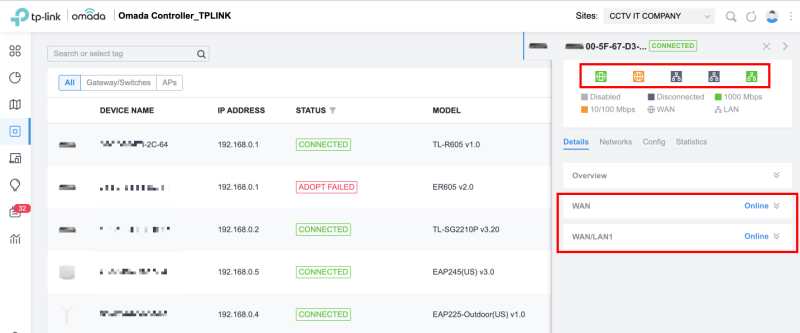
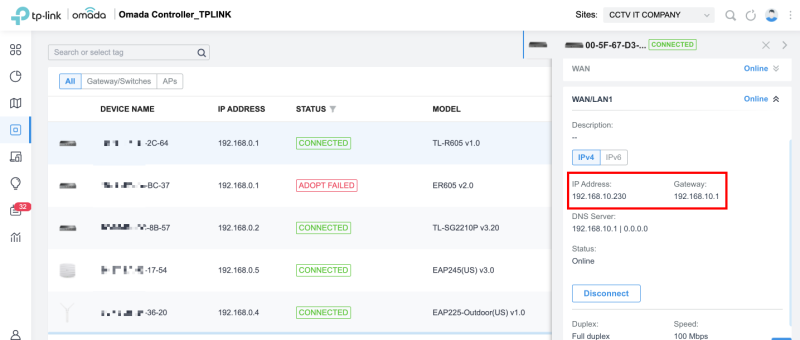
At this point, it may take 1~2 minutes for the router to activate WAN/LAN1. After successful activation, it will display “Online” on the interface of the device. We can check the link speed by the color of each port.
Here both the WAN port and the LAN port are colored green, indicating running at 1000Mbps, the WAN/LAN1 port is orange, indicating running at 10/100Mbps, both the WAN/LAN2 port and the WAN/LAN3 port are colored gray, indicating they are disabled.

Scenario 1: Load Balancing Configuration
For example, your company is registering two Internet lines from 2 different carriers, one with carrier A with 1Gbps bandwidth and the other B with 100Mbps bandwidth. To make the most of the bandwidth of the 2 transmission lines, follow these steps
Go to Settings -> Wired Network -> Internet. In the Load Balancing Weight section, enter 10:1 then Apply
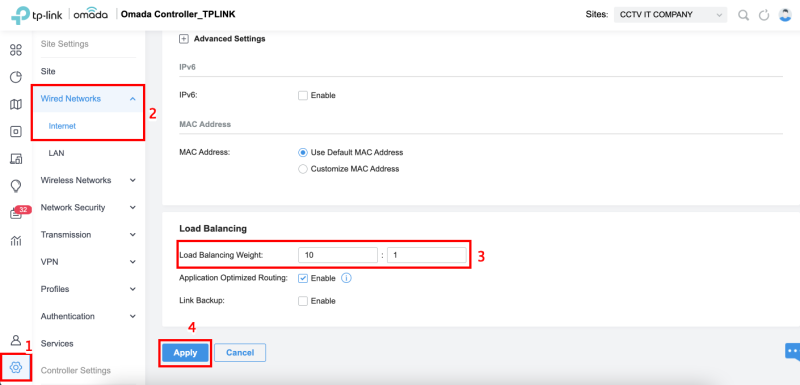
- To get the most out of traffic from multiple WAN connections, you need to set a Load Balancer. The weight is the bandwidth ratio of WAN to WAN/LAN1 to WAN/LAN2 to WAN/LAN3.
- Here in this example, the bandwidth ratio of WAN = 1000Mbps (bandwidth of WAN Port): 100Mbps (bandwidth of WAN/LAN port1) = 10:1
Scenario 2: Configuring Link Backup
- Check Enable Link Backup.
- Select WAN as Primary WAN
- WAN/LAN1 as WAN backup.
- Backup Mode select Always Link Primary
- In mode, select Enable backup link when any primary Wan fails, then click Apply
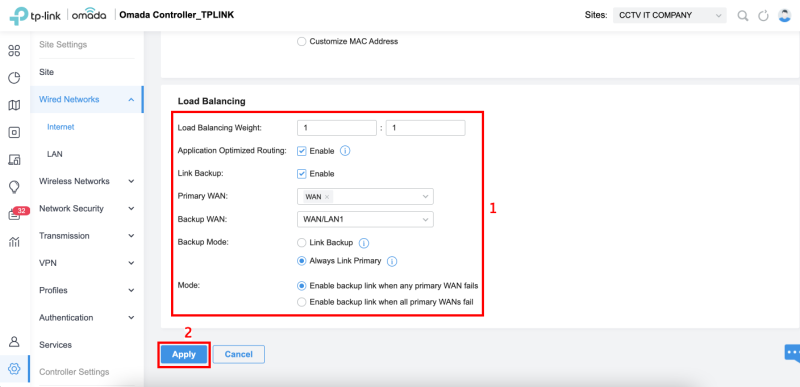
- Backup Link: With the Link Backup function, the system will automatically transfer all new sessions from the disconnected line to another line to keep the network always online.
- Always Link Primary: Traffic is always relayed over the main WAN unless it fails. The system will try to forward traffic through the backup WAN port when it fails and forward it back when it is restored.