

 Tiếng Việt
 CAMERA TRICKS
 IT TRICKS
 APPLICATION SOFTWARE
 VIDEOS

 TOOL
TOOL

 SOLUTION

 TECH NEWS
Hi guys, adding the same camera to the recorder of the same brand is quite simple, but sometimes we encounter the case that the camera & recorder are not the same company, to add the camera to the recorder will be a bit complicated. Today I will guide you to add Imou Camera to Hikvision DVR in a simple way
Contents
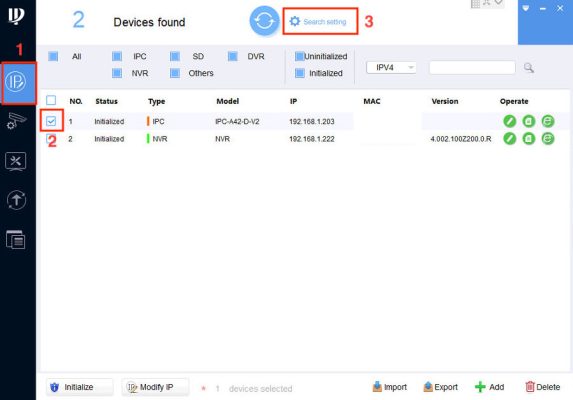
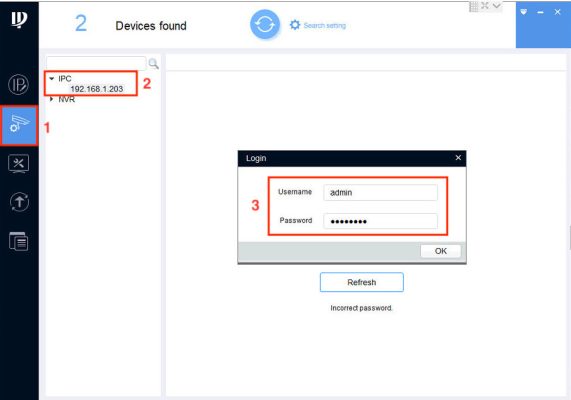
Step 1: You need to set a static IP for Camera Imou using the Config Tool software.
- IP Config -> Check the Camera box needs to set static IP -> Search Setting
- Enter Camera Imou Password in the Password box (Default is Safetycode on Camera stamp)
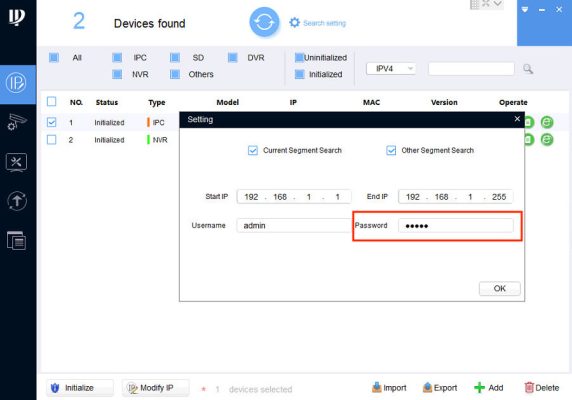
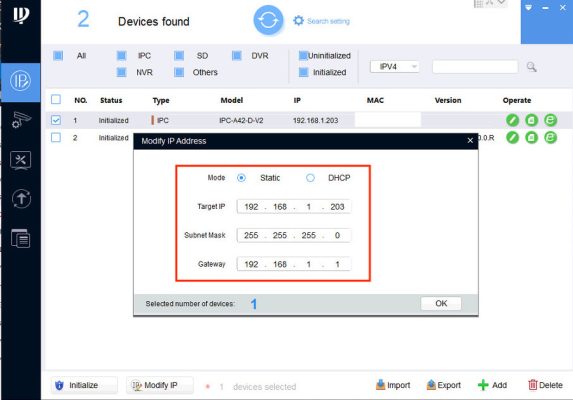
- Then click on the pen icon or Edit, select Static and enter the IP address you need to install
Step 2: Lower the compression standard of Camera Imou to H264
- Devices Config -> Select IP Camera Imou -> Login account and password
- Go to Encode, lower the compression standard to H264 in the Compression section of both Main Stream & Sub Stream, then click OK to save the configuration

Step 3: Proceed to add the Imou Camera to the Hikvision recorder
- After logging into the Hikvision recorder, go to Configuration -> System -> Camera Management -> IP Camera -> Add
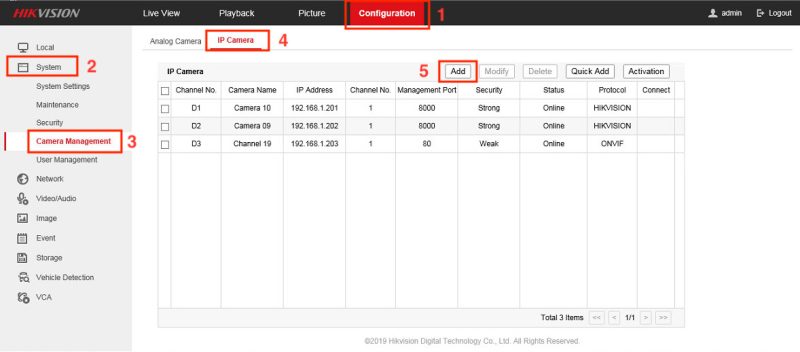
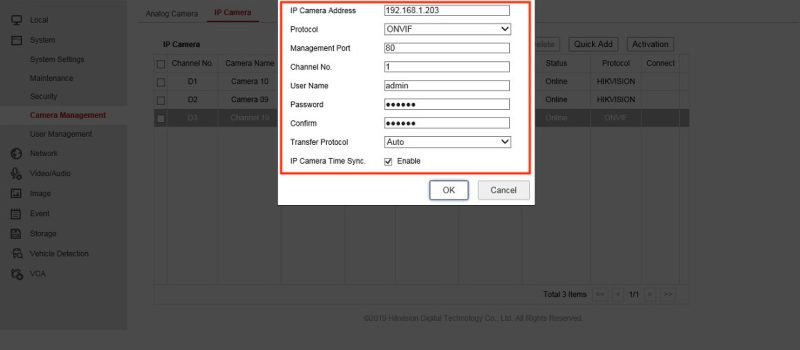
- Readyto enter the door information Camera Imou as follows:
- IP Camera Address: 192.168.1.203 (IP Camera Imou Address)
- Protocol: ONVIF
- Management Port: 80 (I leave the default – Or another port if you change)
- Channel No.: 1
- User Name: admin
- Password: Camera Imou Password (Default is Safetycode)
- Confirm: Re-enter Camera Imou password
- Transfer Protocol: Auto
- IP Camera Time Sync: Check the Enable box
- Then click OK to save the configuration
Thank you for following kabevision.com article!