

 Tiếng Việt
 CAMERA TRICKS
 IT TRICKS

 APPLICATION SOFTWARE
 VIDEOS

 TOOL
TOOL

 SOLUTION

 TECH NEWS
Hi everyone, today I will share with you how to set up Easy Mesh on TP-Link Archer C64 device by 2 wireless ways and plug in the LAN cord in the simplest and most detailed way in the following article
Contents
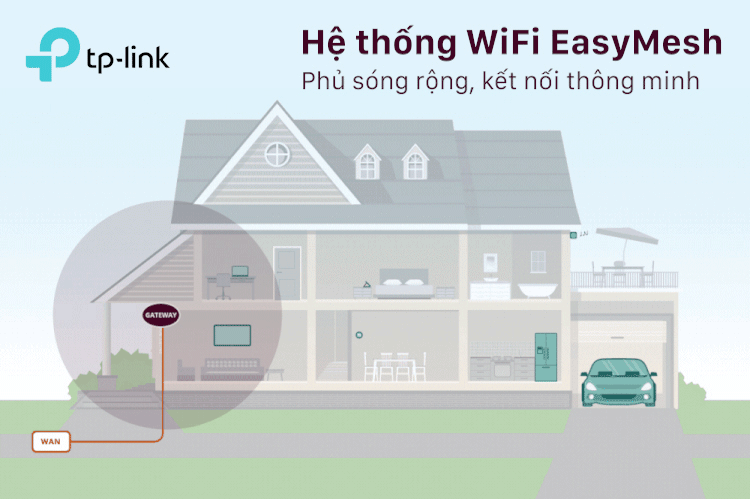
1. What is EasyMesh?
EasyMesh ™ is a certification issued by the Wi-Fi Alliance (Wi-Fi Alliance®), which is a control protocol between APs. To put it simply, Easy Mesh WiFi networks use a common standard that allows devices from multiple providers to create WiFi Mesh networks together. As long as any two routers from different manufacturers support EasyMesh, you can put them on the same network
2. Supporting devices
Devices that support Easy Mesh vary from routers to repeaters. Below is a list of TP-Link products that are expected to receive firmware upgrades that support Easy Mesh
Router
- Archer AX80
- Archer AX73
- Archer AX72
- Archer AX55 v1 (EasyMesh Supported)
- Archer AX53
- Archer AX23
- Archer AX10
- Archer C86 (EasyMesh Supported)
- Archer C80 (EasyMesh Supported)
- Archer A8 (EasyMesh Supported)
- Archer C6
- Archer C64 (EasyMesh Supported)
Repeater
- RE505X
- RE550 (EasyMesh supported)
- RE450 (EasyMesh supported)
- RE315
- RE205
- RE200
3. Equipment requirements
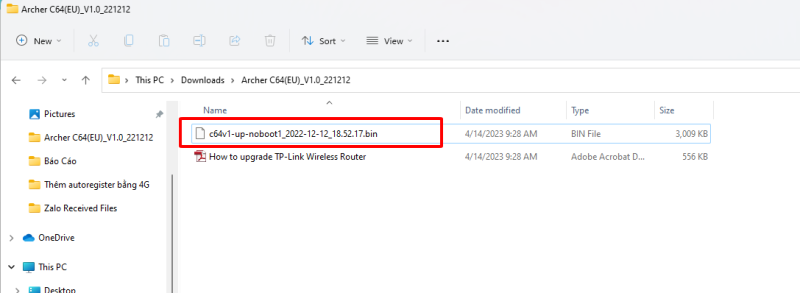
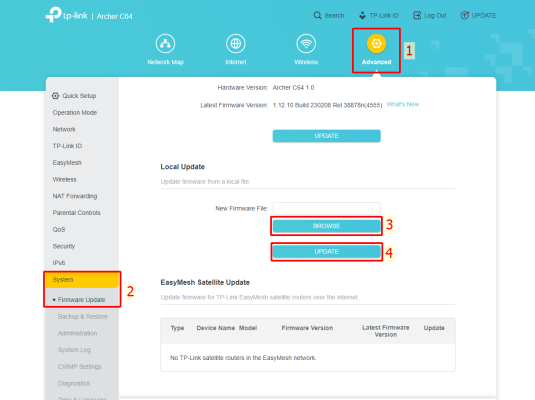
Step 2: To update the Firmware, go to Advanced -> System -> Firmware Update -> Browse select the file.bin then click Update.
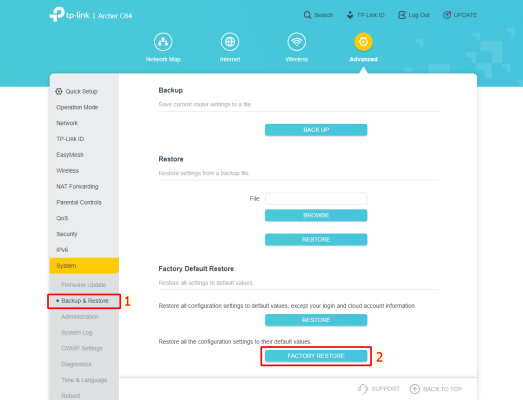
Step 3: After the firmware update is successful. You need to restore the entire system for stable use
4. Set up EasyMesh without LAN wires
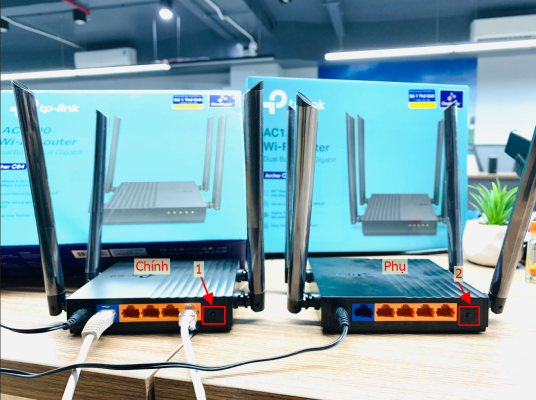
Setting up EasyMesh without Lan wires will have 2 ways to connect, which are directly connected on the Web interface of the Main C64 or by the WPS push button on both C64, we first need to install the Main C64 first following the following steps:
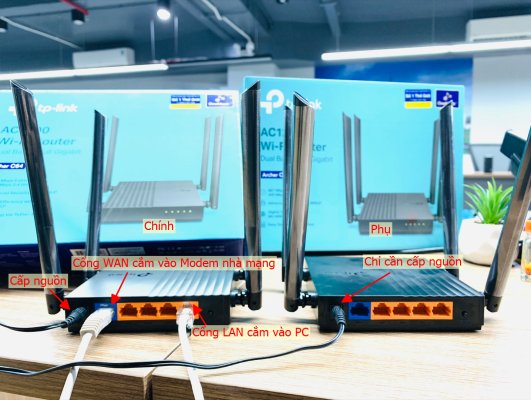
Step 1: Set up the connection for Archer C64 Primary and Secondary as shown below
Step 2: Archer C64 Main Setup
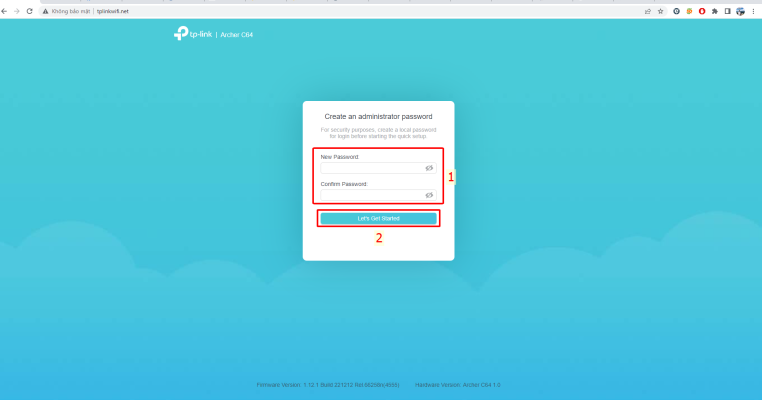
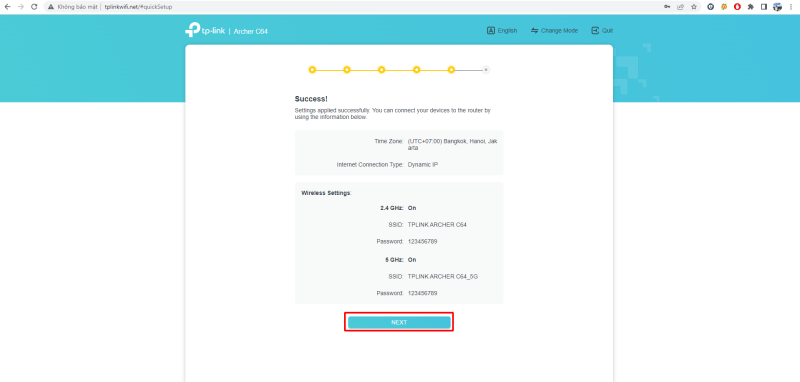
You connect to the Archer C64 by connecting to Wifi emitted directly from the Archer C64 or plugging the LAN wire directly into the PC. Then open Chrome browser, access http://tplinkwifi.net and set a password for Archer C64 Main
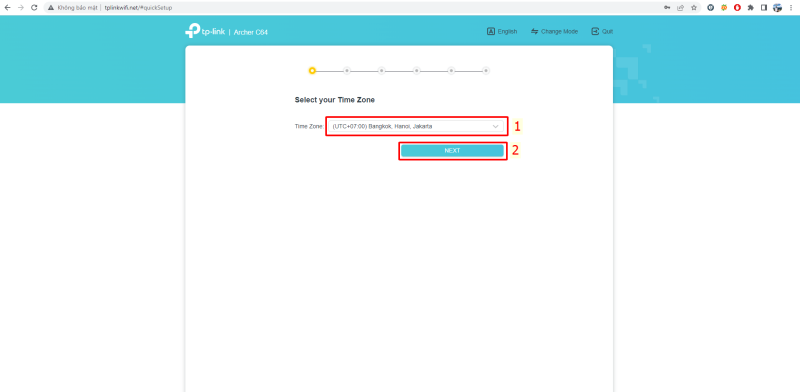
Step 3: Select time zone UTC+7:00 Bangkok, Hanoi, Jakarta -> Next
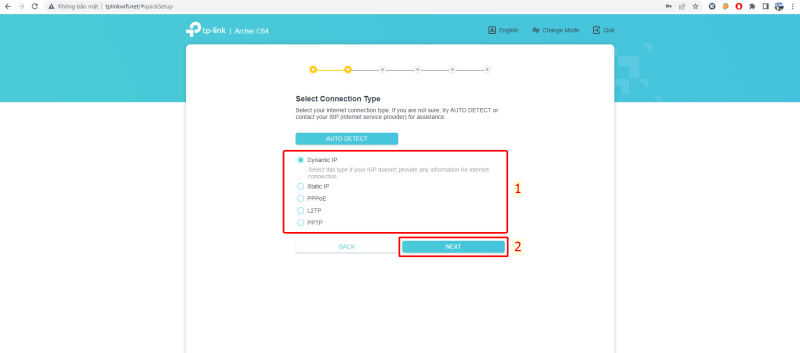
Step 4: Select Dynamic IP or other modes depending on your purpose
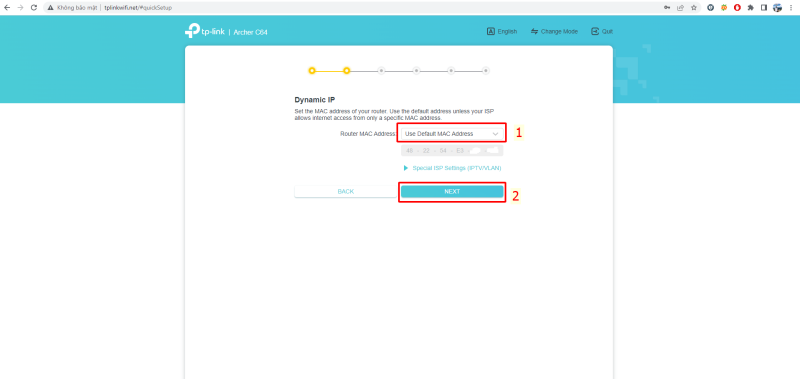
Step 5: Select Use Default MAC Address or the mode you need to use -> Next
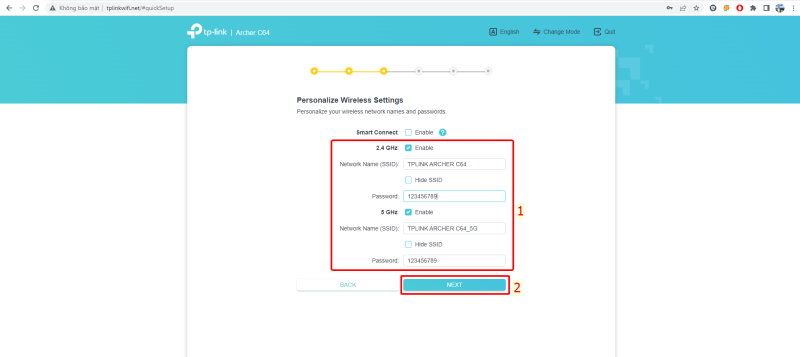
Step 6: Set up a name and password for Wifi -> Next
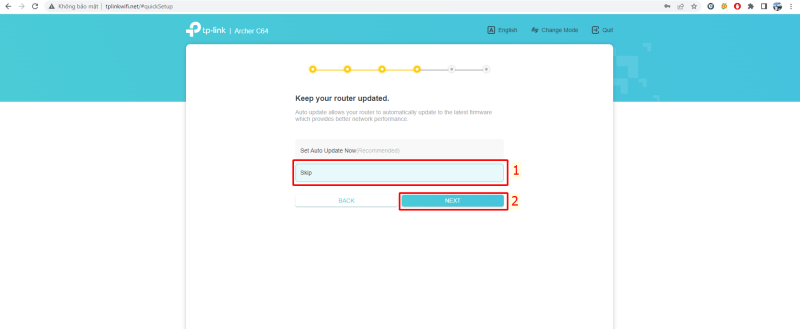
Step 8: Click Next to complete the setup
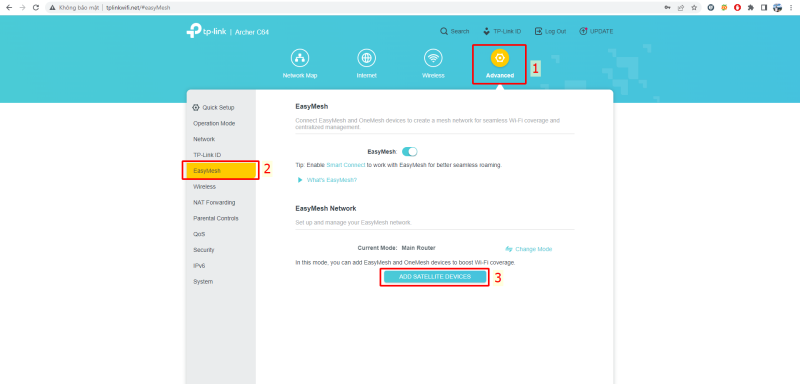
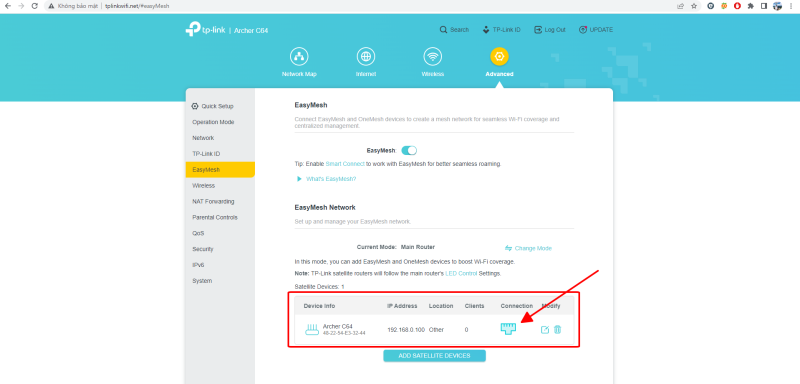
Method 1: Set up EasyMesh directly on the Web Interface of the main Archer C64
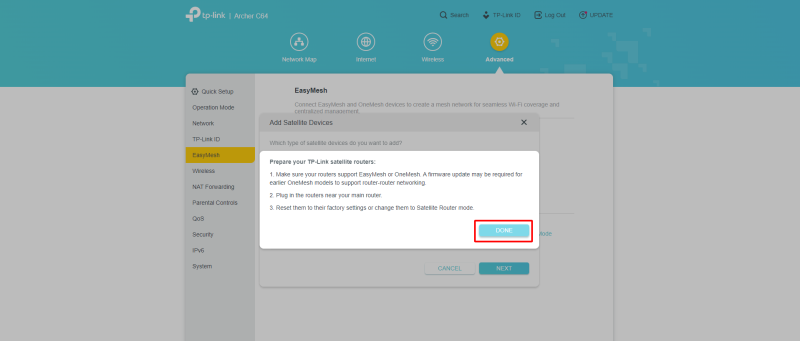
- Go to Advanced -> EasyMesh -> Add Satellite Device
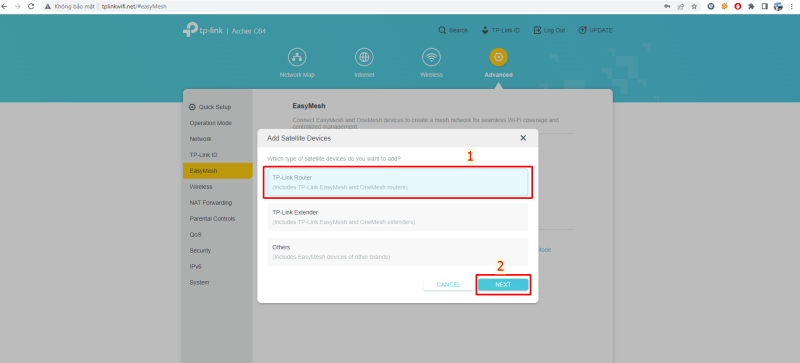
- Select TP-Link Router or other modes depending on the device you need to add to the EasyMesh -> Next -> Done system
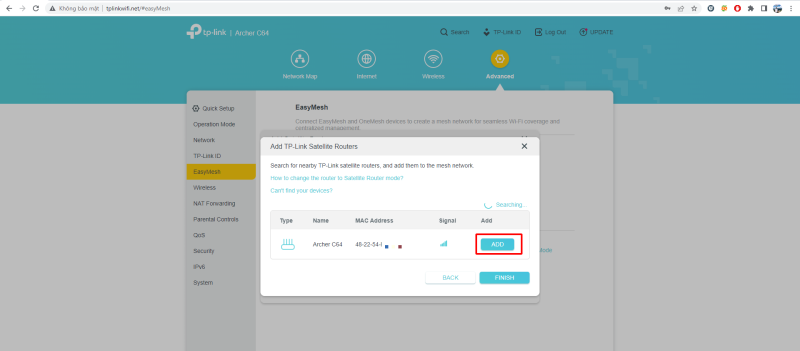
- Select the Acher C64 Secondary device then ADD -> ADD
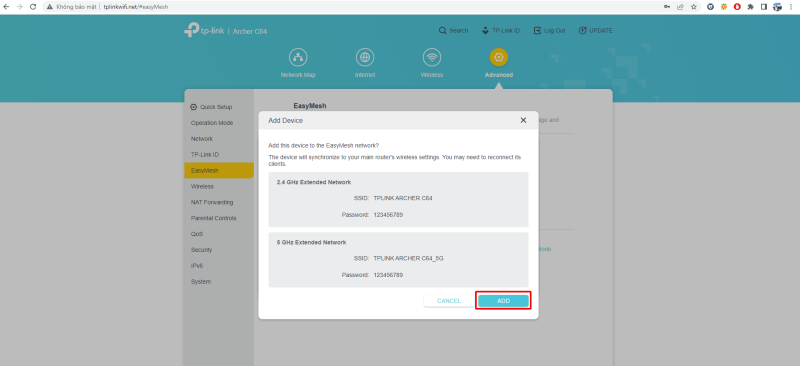
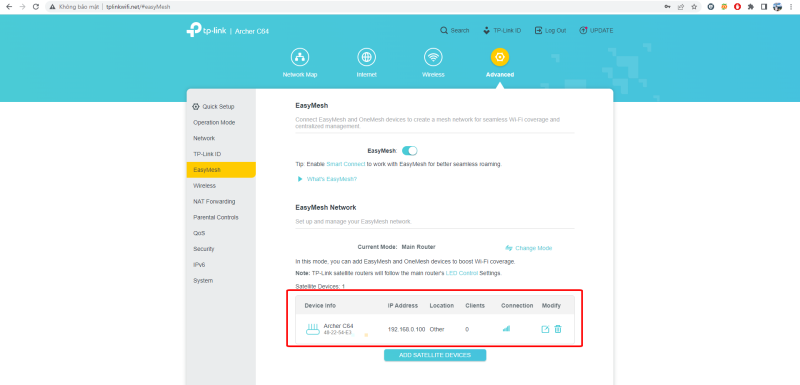
- The status check has been added successfully and the SSID of the Secondary C64 is lost, merging with the SSID of the Primary C64
Method 2: Set up EasyMesh using the WPS button on Archer C64 Primary and Secondary
5. Set up EasyMesh using LAN wires
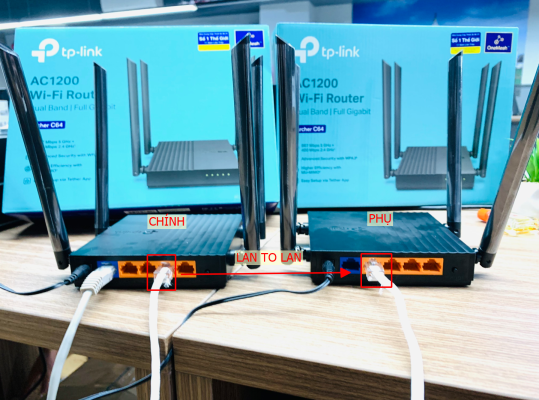
Method 1: Set up EasyMesh directly on the Web Interface of the main Archer C64
- Go to Advanced -> EasyMesh -> Add Satellite Device
- Select TP-Link Router or other modes depending on the device you need to add to the EasyMesh -> Next -> Done system
- Select the Acher C64 Secondary device then ADD -> ADD
- The status check has been added successfully and the SSID of the Secondary C64 is lost, merging with the SSID of the Primary C64
Method 2: Set up EasyMesh using the WPS button on Archer C64 Primary and Secondary
After successfully installing Archer C64 Main, you power the Secondary Archer C64 as shown and press the WPS button on the Main Archer C64 first and then Secondary (press 1 and then release) wait for about 30 seconds, the SSID of the Secondary C64 will be lost, merge with the SSID of the Main C64 -> create Mesh successfully

Thank you for following cctvit.net article!