

 Tiếng Việt
 CAMERA TRICKS
 IT TRICKS


 APPLICATION SOFTWARE
 VIDEOS

 TOOL
TOOL


 SOLUTION

 TECH NEWS
PPSK – Private Pre-Shared Key is a security feature that devices accessing the network are managed without many complicated operations. With PPSK, each user is assigned a unique passcode to authenticate to access the network. You can create a PPSK list and apply it to multiple Wifi SSIDs, saving you from having to install the same information multiple times
1. About PPSK
Omada SDN Controller supports two types of PPSK, PPSK without RADIUS and PPSK with RADIUS.
- PPSK without RADIUS: Just create a PPSK profile on the Omada SDN Controller. (In today’s article I will guide)
- PPSK has RADIUS:
- The EAP acts as a Network Access Server (NAS). You need to create a client in the RADIUS server to allow EAPs to send authentication requests.
- When the client connects to the SSID, EAP uses the client’s MAC address (in the format “xx:xx:xx:xx:xx”) as the RADIUS User and user passcode, which PPSK sends as a Tunnel cipher and sends the information to the RADIUS server for authentication. Therefore, you need to create users in the RADIUS server in the appropriate format.
2. Configuration instructions for PPSK without RADIUS
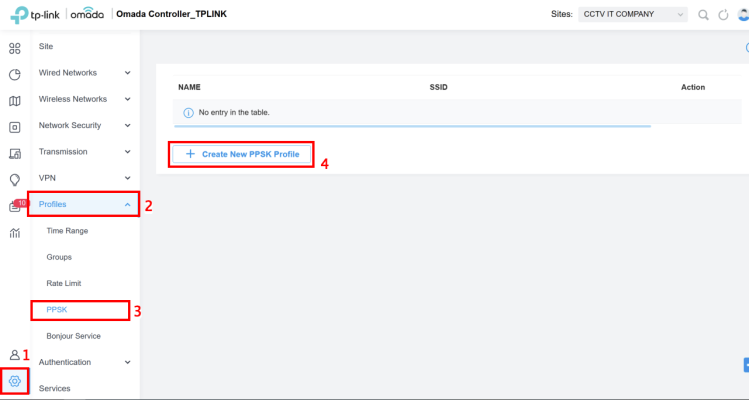
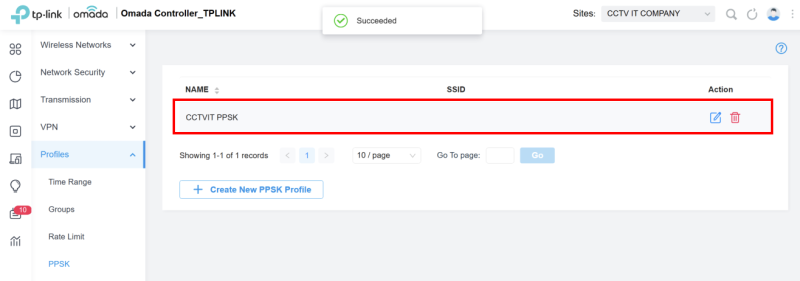
Step 1: Create PPSK Profiles on the Omada Controller, go to Settings -> Profiles -> PPSK -> Create New PPSK Profile
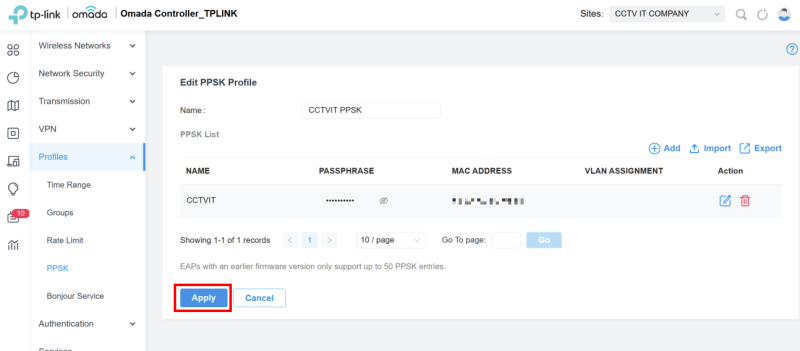
Step 2: Name the PPSK Profile -> Add or Import to add new items in the PPSK Profile. You can also click Import to import items in batches from a file. Here I add a new section as an example
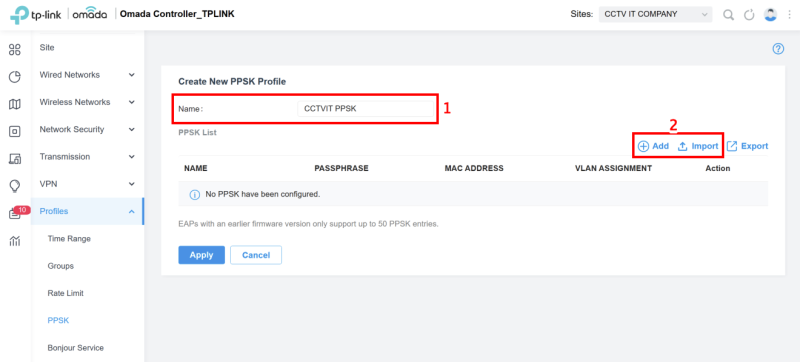
Step 3: Name the PPSK Profile -> Add or Import to add new items in the PPSK Profile. You can also click Import to import items in batches from a file. Here I add a new section as an example
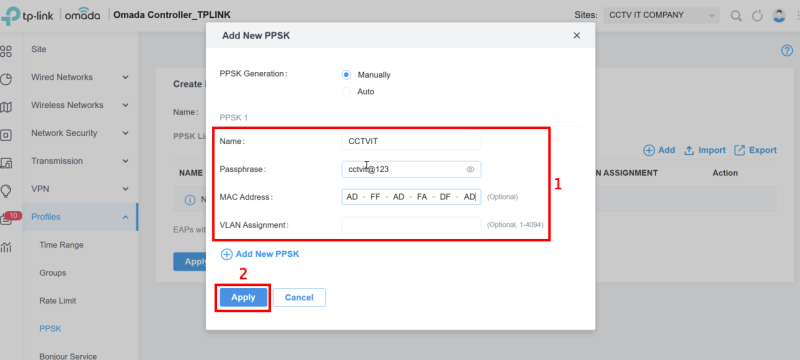
- Name: CCTVIT (Enter the PPSK name to create)
- Passphrase: cctvit@123 (enter a passphrase for guests to use for authentication)
- MAC Address: Enter the MAC address of a device that can use a passphrase for authentication
- VLAN Assignment: Enter the VLAN ID and the client uses the passphrase for authentication that will be assigned to the specified VLAN
- Click Apply to save the configuration
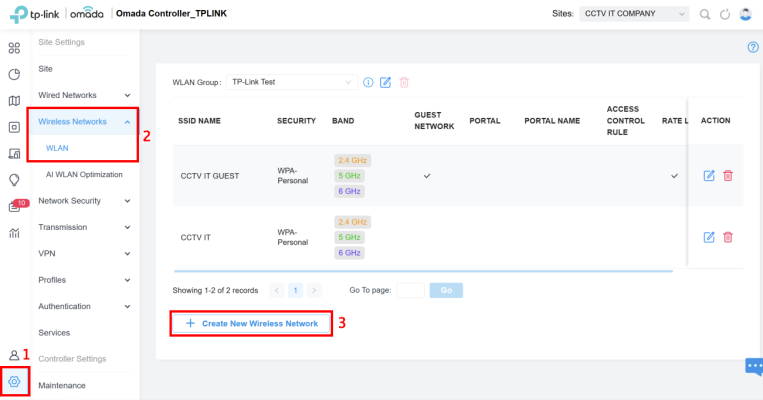
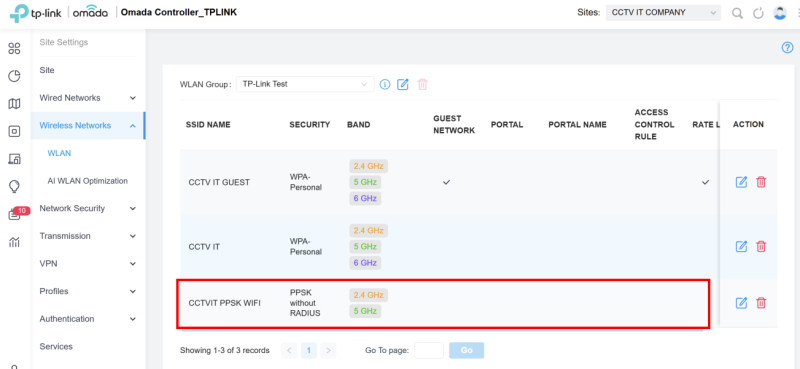
Step 4: Create a Wifi SSID to use PPSK, go to Settings -> Wireless Networks -> WLAN -> Create New Wireless Network
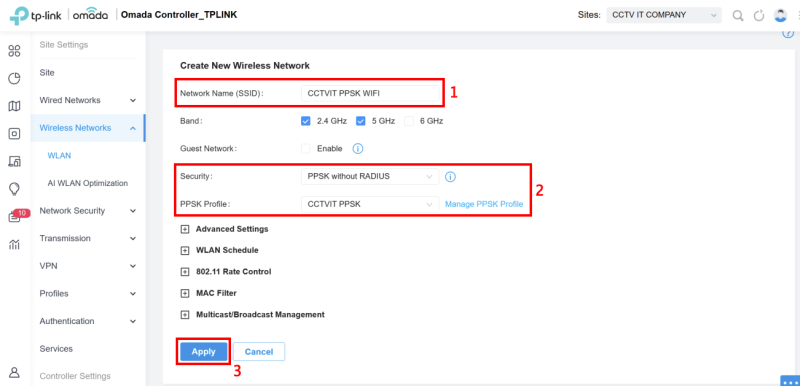
Step 5: Name the Wifi SSID in the Network Name (SSID) field -> Security select PPSK without RADIUS -> PPSK Profile select the PPSK CCTVIT you created -> Apply to save the configuration
Thank you for following cctvit.net article – good luck!